Sunday, May 31, 2009

Creamy Shrimp Alfredo


Tomorrow is my 6th wedding anniversary and my husband and I kept going back and forth regarding what we wanted to do. A weekend getaway would have been most ideal, but with two little ones, it wasn't overly practical. My husband mentioned wanting to make dinner for me and then earlier in the day, he said that he was going to make dinner tonight and then take me out to dinner tomorrow, since my sister so kindly agreed to watch our kids for a bit. (Thank you in advance, Sarah!) This recipe comes from a free Kraft Food and Family Magazine that I've been receiving for years--I hear they now charge for it, though! My husband is cute, because he flips through any cooking magazines I get and always kind of bookmarks those recipes that he wants to make--this being one of them. I ordinarily really enjoy recipes from this magazine, but I was kind of curious as to how "authentic" this would taste. Was I ever pleasantly surprised...it was so rich and creamy and tasted much more similar to alfredo sauces that I've had out, than the previous recipe I posted. (Although that recipe was really good, too--just a completely different flavor!) I really appreciated my husband making this delicious dinner and look forward to our night out tomorrow :)

Creamy Shrimp Alfredo

12 oz fettuccine (uncooked)
4 tablespoons Balsamic Vinaigrette dressing
1 lb uncooked deveined, peeled medium shrimp
6 cloves garlic, minced
12 oz cream cheese, cubed
1 1/2 cups chicken broth
1/2 cup Parmesan cheese, divided
2 tablespoons fresh parsley

Directions:

Cook pasta as directed on package. Meanwhile, heat dressing in large skillet on medium heat. Add shrimp; cook and stir 2 to 3 minutes or until shrimp turn pink, adding garlic for the last minute. Remove shrimp with slotted spoon; set aside.

Add cream cheese and broth to skillet; cook until cream cheese is completely melted, stirring frequently. Stir in shrimp and 3 tablespoons Parmesan cheese.

Drain pasta. Add to skillet; toss to coat. Transfer to platter; sprinkle with remaining Parmesan and parsley.

Source: Adapted from recipe in Kraft Food and Family Magazine (Summer '09)

Saturday, May 30, 2009

Santa Fe Grilled Chicken


This is definitely unlike any recipe I've ever tried! I'm a bit "on the fence"--I think it would be a great quick, weeknight meal, but it seemed to lack something. I think the basic recipe is good and would recommend it, but I wish someone would help me out with a suggestion as to what might enhance the flavor a bit more! I definitely liked the pepper jack cheese (as opposed to just using Monterey Jack) and the salsa complimented the chicken very well, but there's just a little something missing. Then again, the problem may have been that I held back too much with the taco seasoning--I was afraid it would be too spicy/overpowering, so the next time I make it, perhaps I will be a little more generous when I sprinkle it on the chicken.

Santa Fe Grilled Chicken

8 boneless skinless chicken breasts (about 2 pounds)
2 tablespoons vegetable oil
2 tablespoons taco seasoning mix (from 1.25 oz package)
8 slices Monterey Jack cheese (We used Pepper Jack, b/c I couldn't find sliced Monterey Jack)
1 cup chunky salsa

Directions:

Heat gas or charcoal grill. Brush both sides of chicken with oil; sprinkle with taco seasoning mix. Place chicken on grill. Cover grill; cook over medium heat 15 to 20 minutes, turning once and topping each chicken breast with cheese during last minute of cooking time, until juice of chicken is clear when center of thickest part is cut (170 degrees). Serve chicken topped with salsa.

Source: Pillsbury Potlucks & Reunions

Friday, May 29, 2009

Baked Ziti


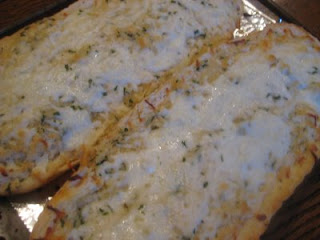
I bet you'd never guess that I am a huge fan of Italian food, would you?!? If I could only eat Italian food for the rest of my life, I'd be quite content :) I came across this recipe on Amber's Delectable Delights and the picture itself sold me! I followed her basic recipe, but changed around a few things...just because the pork sausage I bought came in a 1 lb roll (and her recipe only calls for 1/2 lb) and we also quite enjoy cheese, so we added even more than what the original recipe called for. The pork sausage gave the dish a nice little kick--not too spicy by any means, though! This was a nice, hearty meal that I served with salad and the cheesy garlic bread that I made earlier in the week. Now I just hope I saved enough room for one of the brownies that I made this afternoon!

Baked Ziti

1 box (16 oz) Ziti pasta (I couldn't find ziti to save my soul, so I used mostaccioli)
1 1/2 jars spaghetti sauce
3/4 lb ground beef
1 lb pork sausage
Salt, black pepper, garlic, red pepper flakes (all to taste)
16 oz cottage cheese (or ricotta if you prefer)
8 oz mozzarella cheese
1/4 cup grated Parmesan Cheese
8 slices provolone cheese

Directions:

Preheat oven to 350 and grease the bottom and sides of a 9 x 13 casserole dish.

Bring a large pot of water to a boil, season water with salt, boil pasta till al dente; drain and set aside.

Meanwhile brown sausage and ground beef in skillet and season with desired amounts of salt, black pepper, garlic and red pepper flakes. Drain excess grease away from meats and return back to skillet. Add the jar of spaghetti sauce and let simmer until you are ready to assemble the dish. Place enough sauce mixture on the bottom of the pan so the noodles won't stick. Then assemble the rest of the dish- half of the cooked noodles, all of the cottage cheese, 4 slices of provolone cheese, 1/2 of the remaining sauce, remaining noodles, half of the mozzarella and Parmesan cheese, remaining sauce, remaining cheese.

Bake at 350 degrees for 30 minutes or until cheese is melted and bubbly. Let set 10 minutes to cool before serving.

Source: Adapted from recipe posted on Amber's Delectable Delights

Frosted Fudge Brownies


There are very few times that I crave sweets, but after stumbling across this recipe in one of the Taste of Home cookbooks that my husband got me, I knew I'd have to make these! This is only the second time that I've made brownies from scratch, but the recipe was very easy and to say that they were "heavenly" is such an understatement--they were very rich and moist! I'm thinking they will be quite delicious tonight for dessert, with a scoop of ice cream!

Frosted Fudge Brownies

1 cup plus 3 tablespoons butter, cubed
3/4 cup baking cocoa
4 eggs
2 cups sugar
1 1/2 cups all-purpose flour
1 teaspoon baking powder
1 teaspoon salt
1 teaspoon vanilla extract

Frosting:
6 tablespoons butter, softened
2 2/3 cups confectioners' sugar
1/2 cup baking cocoa
1 teaspoon vanilla
1/4 to 1/3 cup milk (I only used 1/4 cup!)

Directions:

In a saucepan, melt butter. Remove from the heat. Stir in cocoa; cool. In a mixing bowl, beat eggs and sugar. Combien the flour, baking powder and salt; gradually add to egg mixture. Stir in vanilla and the cooled chocolate mixture; mix well.

Spread into a greased 13x9x2 inch baking pan. Bake at 350 degrees for 25-28 minutes or until a toothpick inserted near the center comes out clean. Cool on a wire rack.

For frosting, in a mixing bowl, cream the butter, confectioners' sugar, cocoa and vanilla. Stir in enough milk to achieve spreading consistency. Spread over brownies. Cut into bars.

Source: Winning Recipes from Taste of Home

Tuesday, May 26, 2009

Chicken Parmesan and Cheesy Garlic Bread


This version of Chicken Parmesan was phenomenal, but I did do some MAJOR adjusting in terms of the ingredient proportions as they seemed way off to me! I know a lot of people are on a budget and it kind of sickened me to have to throw away so much of the breadcrumb/Parmesan cheese mixture--especially since the way the recipe was originally written, it called for an entire container of Parmesan cheese--actually more than that, because his recipe was for two boneless-skinless chicken breasts and I used five and only doubled everything else! When I initially started to measure out my ingredients, my gut was telling me that it seemed like way too much, but I tend to always follow recipes exactly as they are written the first time around and then adjust them to suit my family. Again, the chicken was wonderful...I would just highly suggest following my revisions to avoid wasting!

I chose to serve this Chicken Parmesan with homemade garlic bread--when I say "homemade", I'm not referring to making the actual bread...I cheated and had my husband pick up a loaf of Italian bread. It, too, was delicious, but then again, how can you go wrong with something that calls for 1/2 pound of butter?!? I will definitely be making both of these recipes again!

Chicken Parmesan


5-6 boneless-skinless chicken breasts
1 cup flour
2 eggs (beaten)
3/4 tablespoon cayenne pepper
1 1/2 tablespoons dried oregano
1 1/2 tablespoons dried basil
1 cup Italian breadcrumbs
1 cup Parmesan cheese
1-2 jars marinara sauce (or your favorite spaghetti sauce) ***depending on how much sauce you like***
3 cups shredded mozzarella cheese
1 lb box spaghetti (you may even want to make a little extra!)

Directions:

Place chicken breasts between sheets of wax paper and pound the chicken until it's about ½ inch thick throughout. In a pie plate combine breadcrumbs, oregano, basil, cayenne pepper, and parmesan cheese. Crack an egg into a bowl and slightly beat. Take a separate plate and pour flour on it. Dredge your chicken breasts first in flour, then in egg and then in the breadcrumb mixture.

Put your chicken breasts in a pan and sauté until browned on both sides. (only cook until browned, do not cook all the way through)

Place chicken into a greased, oven safe dishes and top chicken with marinara sauce and mozzarella cheese.

Place chicken into the oven and bake at 350 degrees for about 25 minutes. Serve on spaghetti topped with the remaining marinara sauce.

Source: Adapted from recipe originally posted by Blog Chef

Cheesy Garlic Bread

1/2 cup butter
1 1/2 tablespoons garlic powder
1 tablespoon dried parsley
1 (1 pound) loaf Italian bread, cut into 1/2 inch slices
1 (8 ounce) package shredded mozzarella cheese

Directions:

Preheat oven to 350 degrees F (175 degrees C).

In a small saucepan over medium heat, melt butter and mix with garlic powder and dried parsley.

Place Italian bread on a medium baking sheet. Using a basting brush, brush generously with the butter mixture.

Bake in the preheated oven approximately 10 minutes, until lightly toasted. Remove from heat. Sprinkle with mozzarella cheese and any remaining butter mixture. Return to oven approximately 5 minutes, or until cheese is melted and bread is lightly browned.

Source: Allrecipes

***Here's a picture of the breadcrumb/Parmesan cheese mixture I had left...it was an ungodly amount!***


NOTE: This reheated really well...the chicken remained as moist as the first time around!

Double Chocolate Banana Bread


I've had several people express interest in this recipe and I'm SO sorry for the delay in posting! It seems like ordinarily, I buy bananas and they are black within days, but of course when I'm anxiously awaiting for them to ripen, they take their sweet time. My sister gave me a little tip that she learned from my aunt and I couldn't believe how quickly this worked! If you need ripe bananas for a recipe, stick them in the freezer for 24 hours, thaw and they're ready to use :) Another suggestion that I read about was to put bananas in a brown paper bag with an apple--apparently the apple releases a gas that speeds up the ripening process. I was so glad that I was finally able to make this last night and it very much was worth the wait! (Again, please excuse my picture...it was already pitch black outside, by the time I got around to taking it!)

Double Chocolate Banana Bread

1 cup sugar
2 eggs
1/3 cup vegetable oil
1 1/4 cups mashed bananas (about 3)
1 tsp vanilla extract
1 1/2 cups flour
1/2 cup cocoa (I prefer dutch process)
1 tsp baking soda
1 cup semi sweet chocolate chips

Heat oven to 350. Spray bottom of 8x4 inch loaf pan with cooking spray.

Beat sugar, eggs, and oil in large bowl at medium speed until combined. Beat in banana and vanilla at low speed. Combine flour, cocoa and baking soda in medium bowl; beat into banana mixture at low speed just until combined. Stir in chocolate chips.

Spoon batter into pan. Bake 60-70 minutes or until toothpick inserted in center comes out clean. Cool 10 minutes. Remove from pan; cool completely on wire rack.

***No, you're not losing your mind...I did switch pictures! I couldn't get very good light last night, so I took another picture just now :)


Source: The Sister's Cafe

Hearty Hoedown Burgers


Oh my goodness--this picture does not do these burgers justice! We had a late dinner last night and this was the best picture I was able to get...after about 30 attempts! I think I'm seriously starting to drive my husband crazy, but he usually waits patiently to start eating until I sit down with my plate :) Back to the burgers, though! First of all, I am a BIG fan of adding Worcestershire sauce to burgers, so that alone, led me to believe that this recipe would be outstanding! I was a little nervous about my husband's reaction with the onions and peppers, but he really seemed to enjoy his burger! I have never bought "sandwich spread" at the store and spaced buying it for this recipe, so I improvised at the last minute. I found a recipe on Cooks.com for a "Special Sauce Burger Topping" and I thought it tasted a lot like the sauce on McDonald's Big Macs. My first thought was actually to use Donna's sauce recipe (from My Tasty Treasures), but I didn't have any French dressing. I'll include the sauce recipe below, in case you don't have any sandwich spread on hand!

Hearty Hoedown Burgers

1 1/2 pounds lean ground beef
1/3 cup finely chopped onion (1 small)
1/3 cup finely chopped green bell pepper
2 tablespoons Worcestershire sauce
1/2 teaspoon seasoned salt
1/2 teaspoon garlic powder
1/4 teaspoon pepper
6 slices American cheese (we used Smoked Provolone)
6 burger buns, split
1/4 cup sandwich spread (found in the mayonnaise section of the grocery store)
Red onion slices, if desired

Directions:

Heat gas or charcoal grill. In a medium bowl, mix ground beef, onion, bell pepper, Worcestershire sauce, seasoned salt, garlic powder and pepper until well blended. Shape mixture into 6 patties, 1/2 inch thick.

Place patties on grill. Cover grill; cook over medium heat 13 to 15 minutes, turning once, until meat thermometer inserted in center of patties reads 160 degrees. Top each patty with cheese slice; cook just until cheese is melted.

Spread cut sides of toasted buns with sandwich spread; top with onion slices. Place cheese-topped patties on buns.

Special Sauce Burger Topping

1 cup mayonnaise
1/4 cup ketchup
1/4 cup chopped onion
2 Tbsp sweet pickle relish (I only had dill relish, so I added a teaspoon of sugar to cut the tartness)

Combine all ingredients and serve over burgers. (I would suggest chilling if you have time, but if not, it's not the end of the world!)


Source: Pillsbury Potlucks & Reunions

Grilled Corn on the Cob


Bi-color corn is so wonderful and everyone seems to have it on sale now! I've never tried making corn on the grill before, but it was definitely a welcome change...it tasted much more like the corn you get at the fair! You can easily alter the seasonings, according to your preferences--I think it would be delicious with a little Parmesan cheese sprinkled on each piece of corn (in addition to the butter, salt and pepper) or with an "herb butter". We look forward to trying different variations over the summer :)

Grilled Corn on the Cob

6 ears corn
6 tablespoons butter, softened
salt and pepper to taste

Directions:

Preheat an outdoor grill for high heat and lightly oil grate.

Peel back corn husks and remove silk. Place 1 tablespoon butter, salt and pepper on each piece of corn. Close husks.

Wrap each ear of corn tightly in aluminum foil. Place on the prepared grill. Cook approximately 30 minutes, turning occasionally, until corn is tender.

NOTE: I did feel as if the corn could use a little extra salt before serving!


Source: Allrecipes

Saturday, May 23, 2009

Roast Chicken with Lemon and Onion Roasted Potatoes


I've spent a LOT of time looking through my cookbooks recently, trying to come up with new ideas. Both of these recipes come from a cookbook that was put together for me as part of my bridal shower gift. My Mom and sister enclosed recipe cards in my bridal shower invitations and requested that each guest share some of their favorite recipes. I had two bridal showers and received two separate cookbooks...both filled with countless recipes from my family and friends. This chicken recipe was from one of my Mom's friends from college and it was incredible!!! I couldn't get over how moist and flavorful it was. Whole chickens really do intimidate me, but this is definitely worth making. The potato recipe was given to me by one of my grandmother's close friends and they, too, were delicious! The onion soup mix with the potatoes is a wonderful combination!

Roast Chicken with Lemon

1 whole roasting chicken
Lawry's seasoned salt and pepper
1-2 whole lemons, depending on size

Directions:

Preheat oven to 350 degrees. Wash chicken in cold water and drain/pat dry. Sprinkle inside and outside with salt and pepper (rub into all areas). Soften lemon(s) by rolling, then prick them all over with a fork and place INSIDE chicken. Put chicken on roasting pan, breast down and bake 15 minutes (no basting needed).

Turn chicken breast side up. Bake another 20 minutes, then turn oven temperature up to 400 degrees. Bake another 30-60 minutes, checking for "doneness" on poultry setting of meat thermometer.

Source: Tricia Smith

Onion Roasted Potatoes

1 envelope onion soup mix
2-3 pounds potatoes, peeled and cut in chunks
1/3 cup margarine, melted
garlic powder, to taste

Directions:

Preheat oven to 450 degrees. In large plastic bag, add all ingredients. Close bag securely and mix until potatoes are evenly coated. Empty potatoes into shallow baking or roasting pan. Discard bag.

Bake, stirring occasionally for 40 minutes, or until potatoes are tender and golden brown. Garnish with chopped parsley, if desired.

Source: Shirley F.

Easy Sugar Cookies


I give my husband a hard time about the sweets that he consumes, but I'll be the first to admit that cookies are my absolute weakness! I've been having some "behavioral issues" with my son (mostly temper tantrums) and I think a big part of the problem is the fact that he doesn't care to share my attention with his baby sister. I've really been trying to make a conscientious effort to find activities that he and I can do and cookies seemed like the perfect idea for today! I picked this recipe, because I don't believe I've ever made sugar cookies before (even though I love them!) and it seemed like a relatively easy recipe to make with my four year old. It also was a major bonus that this recipe was rated 4.5 out of 5 stars, based on over 1500 reviews on Allrecipes.com! These cookies were so buttery and had the perfect amount of "sweetness"...some sugar cookies are way too sweet for me and they were very simple to make!

Easy Sugar Cookies

2 3/4 cups all-purpose flour
1 teaspoon baking soda
1/2 teaspoon baking powder
1 cup butter, softened
1 1/2 cups white sugar
1 egg
1 teaspoon vanilla extract

Directions:

Preheat oven to 375 degrees F (190 degrees C). In a small bowl, stir together flour, baking soda, and baking powder. Set aside.

In a large bowl, cream together the butter and sugar until smooth. Beat in egg and vanilla. Gradually blend in the dry ingredients. Roll rounded teaspoonfuls of dough into balls, and place onto ungreased cookie sheets.

Bake 8 to 10 minutes in the preheated oven, or until golden. Let stand on cookie sheet two minutes before removing to cool on wire racks.

Note: Several reviewers stated that unless the butter is completely softened, your batter will be too crumbly, so I would suggest making sure you keep that in mind! I set the butter out first thing this morning (it had been in the freezer) and went ahead and stuck it in the microwave to start melting it a bit, before I mixed it with the sugar.

Makes 3 dozen

Source: Allrecipes

Friday, May 22, 2009

Chinese Broccoli Beef


Beef and broccoli is my favorite Chinese dish EVER! My husband and I have both attempted to recreate it at home on countless occasions over the years and it never tastes even remotely close to authentic Chinese food. I was hopeful that I would fall in love with this recipe and while it was very good, my husband and I both were in agreement that it would have been even better, had there been more sauce. I would highly suggest doubling the marinade! All in all, this was as close to the beef and broccoli that I've had out, that we've ever made and we will definitely be making it again!

Chinese Broccoli Beef

1 lb flank steak
4 tablespoons soy sauce
2 tablespoons dry sherry
1 teaspoon cornstarch
1 bunch fresh broccoli (sliced into florets)
2 garlic cloves (minced)
2 slices fresh ginger (finely minced)
2 tablespoons vegetable oil

Directions:

Slice steak against the grain thinly into strips. Place steak in a bowl or sealable bag. Combine soy sauce, dry sherry and cornstarch. Mix well, and pour mixture over steak strips. Marinate for 15 minutes to a half hour.

Heat the wok and add oil. Add minced garlic and ginger root and stir fry over medium-high heat for about 20 seconds. Add beef and stir fry stirring constantly for a couple minutes. Add broccoli and stir fry for 5 minutes or until broccoli is cooked but still crispy and dark green.

Source: Blog Chef

Tuna Patties with Lemon Dill Sauce


My sister, Sarah (Delectable Dining), recently posted this very recipe, except she substituted salmon for the tuna. I've made both versions--my husband really likes the salmon patties, but refuses to try the tuna! My Mom used to make these when we were growing up and I think it's safe to say that it's one of those meals that my sisters and I all enjoyed! I wasn't exactly sure how my kids would feel about this recipe, so I went ahead and made them macaroni and cheese, however, no sooner did I sit down to eat my lunch, they both started swarming around me like a pack of vultures! I halved the recipe, because I figured I'd be the only one eating and needless to say, I got all of a few bites--my kids inhaled ALL of them!!! (One can makes about 4 patties). My little non-picky eaters make their Mommy proud :) Next time, I'll definitely make two cans, because my son was even asking if there were any more tuna patties left for his dinner!

Tuna Patties with Lemon Dill Sauce

2 small cans tuna
1 cup finely crushed saltines
1 cup finely chopped celery
1/2 cup finely chopped onion (more if desired)
1/2 cup mayonnaise
2 eggs, beaten
1/2 teaspoon dry mustard

Lemon Dill Sauce:
1/2 cup mayonnaise
2 tablespoons lemon juice
1 teaspoon (or more) dried dill weed

Directions:

Drain and flake tuna. Stir in cracker crumbs, celery, onion, mayonnaise, eggs and dry mustard. Shape into 12 patties, using about 1/4 cup mixture for each. Cook in a greased skillet for 8-10 minutes, turning once.

For sauce, combine mayonnaise, lemon juice and dill weed. Mix well and spoon over tuna patties.

NOTE: If desired, serve tuna patties in warmed, split pita bread with sauce, lettuce, tomato and cheese.

Source: Adele Fine

Tuesday, May 19, 2009

Creamy Bow Tie Pasta


Not too long ago, I won my first ever giveaway!!! Heidi, from "Tried-and-True Cooking with Heidi" sent me the most recent Taste of Home magazine and it was filled with quite a few recipes that I've been wanting to try! One of those recipes was this pasta dish--I decided to make it tonight, because I thought it would go great with my leftover chicken piccata that we need to finish up and also because I'm working tomorrow and figured it would be great to take for my lunch! The recipe is intended to yield 2 servings, as written, so I went ahead and tripled it :) Thank you so much, Heidi!!! I can't wait to try additional recipes from the magazine!

Creamy Bow Tie Pasta

1 cup uncooked bow tie pasta
1 1/2 teaspoons butter
2 1/4 teaspoons olive oil
1 1/2 teaspoons flour
1/2 teaspoon minced garlic
Dash salt
Dash dried basil
Dash crushed red pepper flakes
3 tablespoons milk
2 tablespoons chicken broth
1 tablespoon water
2 tablespoons shredded Parmesan cheese
1 tablespoon sour cream

Directions:

Cook pasta according to package directions. Meanwhile, in a small saucepan, melt butter. Stir in the oil, flour, garlic and seasonings until blended. Gradually add the milk, broth and water. Bring to a boil; cook and stir for 2 minute or until slightly thickened.

Remove from the heat; stir in cheese and sour cream. Drain pasta; toss with sauce.

Source: Taste of Home Magazine (April/May 2009)

Friday, May 15, 2009

30 Minute Shepherd's Pie


Do you ever feel like there just isn't quite enough time in the day to get everything done? I constantly struggle with trying to figure out what I'm going to make for dinner, that won't involve me having to spend hours in the kitchen! I love my children to death, but they seldom are willing to sit still for more than a minute or two and I don't have the energy to chase them around the house, while trying to keep an eye on the food I'm preparing. I've been looking more recently, trying to find quick dinner ideas. I found ground chuck on sale for $1.58/lb, so I was hoping to come across recipes to utilize the 6 pounds that I bought! The last few times I've been over at my sister's house, I've noticed that she had several "Rachel Ray 30 Minute Meal" cookbooks and I know she's made quite a few of her recipes and never has anything but positive reviews, so I thought I'd try one for myself.

My husband called me tonight, on his way home from work and I asked him to pick up a bag of potatoes. I told him that I had found a Rachael Ray "30 Minute Meal" that I was planning to make for dinner and he replied "it's not Shepherd's Pie is it?" It took me a second, but then it dawned on me that he's been following my blog and I had listed this in the "coming soon" section...it's been a long day and I'm not feeling too "quick"! I nonchalantly mentioned that I was going to fry the meat, before I showered (I tend to shower the night before I work, since I'm not ordinarily a happy camper to be up at 4:45am) and he immediately offered to make dinner when he got home. It's funny, because he can drive me up a wall, but he really can be pretty darn considerate when he tries :) Just as an "FYI"...if your husband tries to be as kind as mine was this evening, you may want to forewarn him that Rachael Ray's "30 minute meals" are a bit deceiving! I suppose if you have a magic fairy around to do all of the prep work, you could *possibly* get it done in 30 minutes, but by the time you cut everything up, it takes more like 45-50 minutes. It sure was well worth it, though! This is true "comfort food" and tasted especially good on such a gloomy night!

30 Minute Shepherd's Pie

2 pounds potatoes, such as russet, peeled and cubed
2 tablespoons sour cream or softened cream cheese
1 large egg yolk
1/2 cup cream, for a lighter version substitute vegetable or chicken broth
Salt and freshly ground black pepper
1 tablespoon extra-virgin olive oil, 1 turn of the pan
1 3/4 pounds ground beef or ground lamb
1 carrot, peeled and chopped
1 onion, chopped
2 tablespoons butter
2 tablespoons all-purpose flour
1 cup beef stock or broth
2 teaspoons Worcestershire, eyeball it
1/2 cup frozen peas, a couple of handfuls
1 teaspoon sweet paprika
2 tablespoons chopped fresh parsley leaves

Directions:

Boil potatoes in salted water until tender, about 12 minutes. Drain potatoes and pour them into a bowl. Combine sour cream, egg yolk and cream. Add the cream mixture into potatoes and mash until potatoes are almost smooth. (My husband added some Kosher salt, as the potatoes were a bit bland).

While potatoes boil, preheat a large skillet over medium high heat. Add oil to hot pan with beef or lamb. Season meat with salt and pepper. Brown and crumble meat for 3 or 4 minutes. If you are using lamb and the pan is fatty, spoon away some of the drippings. Add chopped carrot and onion to the meat. Cook veggies with meat 5 minutes, stirring frequently. In a second small skillet over medium heat cook butter and flour together 2 minutes. Whisk in broth and Worcestershire sauce. Thicken gravy 1 minute. Add gravy to meat and vegetables. Stir in peas.

Preheat broiler to high. Fill a small rectangular casserole with meat and vegetable mixture. Spoon potatoes over meat evenly. Top potatoes with paprika and broil 6 to 8 inches from the heat until potatoes are evenly browned. Top casserole dish with chopped parsley and serve.

Source: Food Network (Rachael Ray 30 Minute Meals)

Tuna Melt


My sister and I were joking around earlier about how we were going to get together one day and make several dishes, all of which contain either tuna or mushrooms...the two things my husband absolutely despises! I've begged and pleaded until I'm blue in the face--there is no way he'll budge on trying anything that has either of those two ingredients included! As soon as my sister mentioned cooking with tuna, I started craving it--the "power of suggestion" is awful, isn't it?!? I had one can of white tuna left and was trying to think of a way to use up these delicious Sara Lee buns that I bought for the burgers we made last night, so I immediately decided to hunt out a tuna melt recipe. I found this recipe on Allrecipes and it sounded perfect--I had everything except for the celery and rye bread, but I wanted to use my rolls, so that wasn't an issue! I increased the onion to compensate for not adding any celery--I'm not a big celery fan anyway! This was a quick and inexpensive meal that I will definitely be making again! Perfect for a last minute lunch idea!

Tuna Melt

2 (6 ounce) cans solid white tuna in water, drained
1/4 cup mayonnaise
1/4 cup finely chopped onion
1 tablespoon chopped parsley
3/4 teaspoon red wine vinegar
1 pinch salt
1 pinch freshly ground black pepper
4 slices of your favorite bread
8 slices ripe tomato
8 slices Swiss cheese
paprika, for garnish

***The original recipe says to add 1/4 cup finely chopped celery, which would probably be really good, if you happen to have it on hand!***

Directions:

Preheat the oven broiler. In a bowl, mix the tuna, mayonnaise, onion, parsley, and vinegar. Season with salt and pepper.

Place the rye bread slices on a baking sheet, and broil 1 minute in the preheated oven, until lightly toasted. Remove from heat, and spread with the tuna salad. Place 1 cheese slice over the tuna salad on each piece of bread, layer with a tomato slice, and top with remaining cheese slices.

Return layered bread to the preheated oven, and broil 3 to 5 minutes, until cheese is melted. Sprinkle with paprika, if desired.

Source: Adapted from recipe posted on Allrecipes

Thursday, May 14, 2009

Best Beef Burgers


There's nothing I enjoy much more than a big, juicy burger with all of the "fixings"! My son was supposed to have another soccer game tonight, so I wanted to come up with a relatively quick dinner idea. I made the patties ahead of time, so my husband would be able to throw them on the grill as soon as we got home. Unfortunately, his game was canceled, due to all of this rain we've had, but at least my dinner was ready to go! I gave my husband very specific grilling instructions (according to the recipe) and I know it was driving him crazy to not follow his normal regimen. He followed the directions to a tee and let me tell you...these burgers were perfectly cooked! Searing them first really locked in all of the juices and made for a delicious burger. I have a feeling my husband may stick to this preparation method from now on--even though he always has made really good burgers :)

Best Beef Burgers

2 pounds ground chuck
1 tablespoon Dijon mustard
1 tablespoon Worcestershire sauce
Coarse salt and fresh ground pepper
4 hamburger buns (I bought Sara Lee buns...so good!)

Suggested Accompaniments:
Cheese slices
Sliced Beefsteak tomatoes
Red and white onions (raw or grilled)
Ketchup
Mustard
Pickles
Mayonnaise
Boston lettuce leaves

***I used swiss cheese, beefsteak tomatoes, vidalia onions, Sweet Baby Ray's BBQ sauce, mayo and lettuce!***

Directions:

Heat the grill to high. In a medium bowl, use a fork to gently combine the ground chuck with the Dijon mustard and Worcestershire sauce; season generously with salt and pepper. Gently form into four 1-inch-thick patties.

Place the patties on the hottest part of the grill; sear until browned, 1 to 2 minutes per side. Move the patties to the cooler part of the grill; continue grilling until desired doneness, 4 to 8 minutes per side.

Split the hamburger buns and toast on the grill if you like; place a burger on each bun and serve with the desired accompaniments.

Source: Everyday Food: Great Food Fast

Wednesday, May 13, 2009

Chicken Piccata


Over the years, I've heard my Mom talk about how much she enjoyed Chicken Piccata and I actually made a version I found on Allrecipes a few months back. Needless to say, it didn't make it to my blog, because I thought it was absolutely awful! This version, however, was from a Barefoot Contessa cookbook and it was like night and day! This particular recipe was so flavorful and moist and so much easier to make. I actually made 6 good-sized chicken breasts, because I wanted to make sure I had leftovers for the weekend, since I'm working all day on Saturday and Sunday, but I kept all the rest of the ingredients the same and I actually still had to dump a little bit of the flour, egg and breadcrumbs. (I wasn't the least bit skimpy with my coating, either!) The sauce did have a distinctive lemony flavor, so I served it to my kids without the sauce and they both licked their plates clean. You may even want to consider cutting back on the amount of lemon juice, because it was a tad bit overpowering. Definitely a keeper :)

Chicken Piccata

4 split (2 whole) boneless, skinless chicken breasts
Kosher salt and freshly ground pepper
1 cup all-purpose flour
2 extra-large eggs
1 1/2 cups seasoned dried bread crumbs
Good olive oil
3 Tablespoons unsalted butter, at room temperature
1/3 cup freshly squeezed lemon juice (2 lemons), lemon halves reserved
1/2 cup dry white wine
Sliced lemon for serving
Chopped, fresh flat-leaf parsley for serving

Directions:

Preheat the oven to 400 degrees. Line a sheet pan with parchment paper.

Place each chicken breast between 2 sheets of parchment paper or plastic wrap and pound it out to 1/4 inch thick. Sprinkle both sides with salt and pepper.

Mix the flour, 1 teaspoon salt, and 1/2 teaspoon pepper on a shallow plate. In a second plate, beat the eggs and 1 tablespoon water together. Place the bread crumbs on a third plate. Dip each chicken breast first in the flour, shake off the excess and then dip in the egg and breadcrumb mixtures.

Heat 2 tablespoons olive oil in a large saute pan over medium to medium-low heat. Add 2 chicken breasts and cook for 2 minutes on each side, until browned. Place them on the sheet pan while you cook the rest of the chicken. Heat more olive oil in the saute pan and cook the second 2 chicken breasts. Place them on the same sheet pan and allow them to bake for 5 to 10 minutes while you make the sauce.

For the sauce, wipe out the saute pan with a dry paper towel. On medium heat, melt 1 tablespoon of the butter and then add the lemon juice, white wine, the reserved lemon halves, 1/2 teaspoon salt and 1/4 teaspoon pepper. Boil over high heat until reduced by half, about 2 minutes. Off the heat, add the remaining 2 tablespoons of butter and swirl to combine. Discard the lemon halves. Serve one chicken breast on each plate, spoon the sauce and serve with sliced lemon and a sprinkling of fresh parsley.

Source: Barefoot Contessa

Peanut Butter Cookies


We went to visit my grandparents yesterday and as usual, my grandmother refused to allow me to bring anything. Regardless of how much I beg, she always says the same thing..."when you're a grandmother, you'll understand". I absolutely adore them and am having a hard time dealing with the fact that they're getting older. I have so many wonderful memories--they used to pick my two sisters and myself up, treat us to dinner and then take us to a play at a local high school, followed by us spending the night at their house. It was alway such a treat! Anyway, I knew I wasn't going completely empty-handed, so I stayed up making batch, after batch of these peanut butter cookies...my "Popie's" favorite. (That's what we've always called my grandfather!) They always seem to enjoy when I bring them cookies--god love my grandmother, but I don't think she has much patience for baking. She recently told me that she put 48...yes, you heard me right...FORTY-EIGHT cookies on one cookie sheet and then was disappointed when she opened the oven to find that they were pretty much one big cookie. I get such a kick out of her and the way she does things...you'd have to know her to fully understand. I wanted to share this recipe, because this recipe was given to me, shortly before I got married, and the cookies are very good! I love a nice, crisp cookie and that's exactly what you will get!

Peanut Butter Cookies

1 cup brown sugar
1 cup sugar
1 cup shortening
1 cup peanut butter
2 eggs
2 cups flour
2 teaspoons baking soda
1 teaspoon salt

Directions:

Preheat oven to 350 degrees. Mix sugar and shortening together in large mixing bowl. Add in peanut butter and mix until blended. Mix in eggs. Mix in flour, baking soda and salt and stir until thoroughly mixed. Drop by spoonful onto lightly greased cookie sheet and crisscross with fork. (I dip my fork in sugar, before crisscrossing!) Bake 9-11 minutes, until golden brown. Place on cooling rack and cool completely.

These were just a couple of the pictures I took yesterday...I love watching my own children interact with my grandparents!


Source: Erin N.

Monday, May 11, 2009

Shrimp Alfredo


I was all set to make this for dinner last night, but my husband and son insisted that they wanted me to relax, while they prepared dinner. It was very cute watching them methodically measure everything out and take such pride in the meal they were preparing :) This recipe comes from a blog that I am absolutely in love with--I don't think I've ever seen him post something that I didn't immediately want to try! I sat anxiously waiting for them to announce that dinner was ready, as the smell taunted me from the kitchen. This is a very interesting twist on traditional "alfredo". I found it to be absolutely delicious, although my husband was a little turned off by the onions. (Fine by me, because that means that I get the leftovers!!!) Keep in mind...my husband is extremely picky, so while I love him dearly, I wouldn't necessarily go by his opinion, as I would eat this again in a heartbeat! (I just wanted to give a "heads-up" to those of you who don't care much for onions, as they did stand out in the dish!) Just as an "FYI"...the sauce continued to thicken over time...I know it looks pretty thin in the picture, but that's only because we were too hungry to wait! Also, we doubled all of the ingredients, except for the shrimp, as 8 ounces of pasta didn't seem like very much to me--especially with the pound of shrimp.

Shrimp Alfredo

1 lb medium raw shrimp (peeled and deveined with tails removed)
6 garlic cloves (sliced in half)
1 medium onion (diced)
¾ cup grated parmesan cheese
8 ounces fettuccini (or your favorite pasta)
1 tablespoon olive oil
1 tablespoon butter
1 cup whole milk
1 teaspoon cornstarch
seasoning salt
ground black pepper
Minced fresh parsley (for garnish)

Directions:

Bring to large pot of water to a boil and cook pasta according to package directions. Meanwhile, in a small bowl mix cornstarch and milk. Set aside. In a large frying pan heat butter and oil. Add garlic and onions, cook for 5 minutes or until garlic is soft. Mash garlic with the bottom of a fork. Add shrimp and cook until it just turns pink (about 1 ½ minutes). Stir milk mixture into the pan. Cook while stirring constantly until the sauce has thickened (about 2 minutes).

Pour mixture over cooked pasta. Mix in parmesan cheese, salt and pepper. Garnish with parsley.

I had to include a couple pictures of my "boys" preparing dinner...


Source: Blog Chef

Sunday, May 10, 2009

Overnight Caramel French Toast


First and foremost...Happy Mother's Day to all of you Moms and Moms-to-be! I hope you all have the wonderful and relaxing day that you deserve :)

Well, we had my son's first soccer game yesterday, that was BEYOND adorable...my son even scored his first goal! I'm kind of getting into this whole "soccer Mom" thing, which may surprise those who know me, as I am not a huge sport's fan, by any stretch of the imagination, nor am I very "outdoorsy". I feel as if I'm having this strange transformation--I even went with the kids after soccer, to go buy some veggies to plant and we also got some flowers later in the evening and I'm actually excited to do some gardening today! What in the world is happening to me?!? :) Now, on to my recipe...My husband and I decided that today was going to be a relatively "lazy day" (other than the gardening), so I suggested this recipe for breakfast! We got it all ready before bed last night, threw it in the oven this morning and "voila"...breakfast was served! As you've probably noticed, I haven't posted very many breakfast recipes--I've never been much of a breakfast fan! This french toast was a little on the "rich" side for me, but I'm not too big into sweets. One suggestion I would make is to bake the french toast a little longer, so it doesn't come out soggy!

Overnight Caramel French Toast

1 cup packed brown sugar
1/2 cup butter
2 tablespoons light corn syrup
12 slices white or wheat bread
1/4 cup sugar
1 teaspoon cinnamon, divided
6 eggs
1 1/2 cups milk
1 teaspoon vanilla extract

Directions:

In a small saucepan, bring the brown sugar, butter and corn syrup to a boil over medium heat, stirring constantly. Remove from the heat.

Pour into a greased 13x9 inch baking dish. Top with six slices of bread. Combine sugar and 1/2 teaspoon cinnamon; sprinkle half over the bread. Place remaining bread on top. Sprinkle with remaining cinnamon-sugar; set aside.

In a large bowl, beat the eggs, milk, vanilla and remaining cinnamon. Pour over bread. Cover and refrigerate for 8 hours or overnight.

Remove from refrigerator 30 minutes before baking. Bake, uncovered, at 350 degrees for 30-35 minutes.

Source: The Taste of Home Cookbook

Saturday, May 9, 2009

Best Ever Banana Bread


My son has his FIRST soccer game this morning and seeing as how I knew we'd be running around, frantically trying to get ready, I opted to make this bread which would serve as a quick breakfast to eat while having a much needed cup of coffee! I've experimented with countless banana bread recipes over the years and actually toyed with the idea of making one from my sister's blog, but in the end, I decided to try a new one! This is the actual recipe name, although I would have to say...it honestly is the BEST banana bread I have ever had! I tried a little piece last night before bed and it was so unbelievably moist and flavorful--I would highly suggest you try it the next time you have overly ripe bananas!!!

Best Ever Banana Bread

1-3/4 cups all-purpose flour
1-1/2 cups Domino® or C&H® Granulated Pure Cane Sugar
1 teaspoon baking soda
1/2 teaspoon salt
2 eggs
2 medium ripe bananas, mashed (1 cup)
1/2 cup vegetable oil
1/4 cup plus 1 tablespoon buttermilk (see below, if you don't have buttermilk!)
1 teaspoon vanilla extract
1 cup chopped walnuts (we omitted the nuts!)

Directions:

In a large bowl, stir together flour, sugar, baking soda and salt. In another bowl, combine the eggs, bananas, oil, buttermilk and vanilla; add to flour mixture, stirring just until combined. Fold in nuts.

Pour into a greased 9-in. x 5-in. loaf pan. Bake at 325° for 1 hour 20 minutes or until a toothpick comes out clean. Cool on wire rack.

A note to less experienced cooks, as myself: To make one cup of buttermilk, add 1 tablespoon lemon juice or white vinegar plus enough milk to measure one cup. Thank goodness for the "ingredient substitution" section in my Taste of Home Cookbook!

I'm now off to eat a slice with my cup of coffee :)

Source: Taste of Home

Friday, May 8, 2009

Honey Garlic Ribs


I've always just cooked spareribs slowly in the oven and basted with barbecue sauce toward the end, but I thought I'd "spice it up" a bit. This may be my new favorite way to prepare ribs! The sauce had an incredible flavor and the smell while cooking was unbelievable! My husband and I inhaled them and I even went back for seconds :) Knock on wood, I generally have pretty good luck when searching on Allrecipes.com--I always make sure I select recipes that have high ratings and the reviewers were right on with this one!

Honey Garlic Ribs

4 pounds pork spareribs
1/2 cup honey
1/4 cup soy sauce
1/4 cup distilled white vinegar
2 cloves garlic, minced
2 tablespoons brown sugar
1 teaspoon baking soda
1 teaspoon garlic salt

Directions:

Preheat oven to 375 degrees F (190 degrees C). Slice the ribs into individual pieces. In a large bowl, combine the honey, soy sauce, vinegar, garlic and brown sugar. Stir until honey and sugar are completely dissolved, then stir in the baking soda. The mixture will begin to foam. Transfer ribs to the bowl, and turn to coat.

Cover a cookie sheet with foil, and arrange the ribs meat side up on the sheet. Pour excess sauce over all, and sprinkle with the garlic salt. Bake for 1 hour, turning every 20 minutes.

Source: Allrecipes

Wednesday, May 6, 2009

Soft Chocolate Chip Cookies


This recipe comes from Heidi (Tried-and-True Cooking with Heidi)--I saw it on her blog last month and have been itching to try these cookies! Never before had I heard of adding pudding mix to cookies, but you would not believe how much of a difference it makes!!! As Heidi mentions on her blog, they are soft, but not "cakey"--definitely worth trying!!! I'd be shocked if these cookies last much more than a few days around here!

Soft Chocolate Chip Cookies

2-1/4 cups all-purpose flour
1 teaspoon baking soda
1 cup butter, softened
3/4 cup packed brown sugar
1/4 cup white sugar
1 (3.4 ounce) package instant vanilla pudding mix
2 eggs
1 teaspoon vanilla extract
2 cups semisweet chocolate chips

Preheat oven to 350 degrees. Sift together the flour and baking soda, set aside.
In a large bowl, cream together the butter, brown sugar, and white sugar. Beat in the instant pudding mix until blended. Stir in the eggs and vanilla. Blend in the flour mixture. Finally, stir in the chocolate chips. Drop cookies by rounded spoonfuls onto ungreased cookie sheets.
Bake for 10 to 12 minutes in the preheated oven. Edges should be golden brown. Makes 4 dozen

***Also, Happy Nurse's Day to any fellow nurses out there!*** My husband surprised me this afternoon with a card, balloon and some beautiful flowers...VERY sweet! My little guy wanted me to take a picture of him with the balloon :)


Source: Tried-and-True Cooking with Heidi

Tuesday, May 5, 2009

Slow-Cooker Turkey Breast


Thanksgiving is one of my absolute favorite holidays...I always look forward to the dinner, especially the turkey--in addition to getting together with my family, of course! As much as I enjoy turkey, I don't know why I have never made a turkey breast?!? When I was out grocery shopping the other night, I noticed that Kroger had turkey breasts on sale for $.99/lb, so I thought I would give it a shot--after all, my sister has always raved about how easy and delicious her turkey is, that she makes in the crockpot with apple juice. I've been trying to be good about "meal-planning" for the week, especially now that we've got my son's soccer practices, so I thought that today would be the perfect day to try this recipe!

Slow-Cooker Turkey Breast

(1) 4-6 pound turkey breast
1 1/2 cups apple juice
Garlic Powder
Garlic Salt (optional)

Place turkey breast in slow-cooker. Pour apple juice over turkey and make sure that there is at least an inch to an inch and a half of apple juice covering the bottom of your slow-cooker--you may need a little more than a cup and a half! Sprinkle generously with garlic powder and garlic salt. Cook on low for 6-8 hours, depending on the size of your turkey.

Source: Sarah O'Brien

Baked Rice


Ordinarily, I wouldn't think to serve anything other than mashed potatoes with turkey, but since we just had mashed potatoes the other day (and potatoes again for dinner last night), I went in search of an alternate plan! My goal was to find a recipe that would be quick and easy--I knew my turkey would be ready by the time we got home from soccer practice, so when I found this recipe, I knew it would be perfect! I got the rice all ready to stick in the oven as soon as we got home, so by the time I bathed my son and cut up the turkey, it was just about time to sit down and eat. By no means is there anything particularly "fancy" about this recipe, but it's a nice alternative to making ordinary white rice on the stove.

Baked Rice

2-3 Tablespoons oil
1 cup long grain rice
2 cups stock

Directions:

Preheat the oven to 350 degrees F.

Lightly brown the rice in oil in a 1-quart, ovenproof saucepan. Bring the stock to a boil and pour over the rice, take caution because this can create a lot of hot steam. Bake covered for 30 to 40 minutes, until rice is tender and fluffy.

NOTE: I used 1 1/2 cups of rice and 3 cups of stock and baked it in a 2 quart glass baking dish--this would be an adequate amount of rice for a family of four.

Source: FoodNetwork.com

Sunday, May 3, 2009

Hoedown BBQ Chuck Roast


Finally the grilling season is upon us! I absolutely LOVE this time of year!!! I've been searching for new recipes and have come across many wonderful grilling ideas. This was another recipe I found, while searching through my Mom's cookbooks and I can't begin to tell you how yummy it smelled while cooking! My husband was so kind as to do the actual grilling and he chose to wrap the meat in foil before placing it on the grill. This worked out really well, because it seemed to prevent the meat from burning and I would certainly do this again--or I guess I should say that I'd have my husband do this again, as grilling is more his thing! The only thing that was slightly disappointing was that the meat seemed a little tough, but I think the marinade itself would be delicious on a more tender cut of meat.

Hoedown BBQ Chuck Roast

1 boneless beef chuck roast (4 lb), 2 inches thick
1/4 cup sugar
1/2 cup soy sauce
1/2 cup ketchup
1/4 cup red wine vinegar
1 to 2 garlic clove, minced
1/8 teaspoon pepper

Directions:

Trim fat from beef roast. In 12x8-inch (2 quart) glass baking dish or large resealable food storage plastic bag, mix remaining ingredients. Add roast; turn to coat. Cover dish or seal bag. Refrigerate 6 hours or overnight, turning once or twice to marinate.

Heat gas or charcoal grill. Remove roast from marinade; reserve and refrigerate marinade. Place roast on grill. Cover grill; cook over medium-lw heat 50 minutes to 1 hour 15 minutes or until of desired doneness, turning once and basting with reserved marinade during last 15 minutes of cooking time. Discard any remaining marinade.

Note: To bake the roast, place in shallow roasting pan; bake at 325 degrees for 1 hour 15 minutes to 1 hour 30 minutes, turning once and basting with reserved marinade during last 15 minutes of baking time.

Source: Pillsbury Potlucks & Reunions

Saturday, May 2, 2009

Chicken Pasta Salad


If this isn't "heaven on a plate", I don't know what is?!? My sister, Sarah, made this a few years ago and as soon as I took that first bite, I wanted to eat the entire bowl! This is my absolute favorite pasta salad EVER! It can be kind of an expensive pasta salad to make, but this time of year, it seems as if you find vidalia onions and avocados on sale. The recipe calls for cherry tomatoes, but it somewhat sickened me to spend $3.99 for a tiny little 10 oz package, so I opted to use roma tomatoes. It definitely is better with the cherry tomatoes, but certainly wasn't bad with the Roma. I also used (2) 16 oz packages of pasta---more for leftovers :) Keep in mind...you can imagine how much I love this pasta salad, because no one else in my house will eat it and I STILL used two packages of pasta!

Chicken Pasta Salad

4 boneless, skinless chicken breast halves
1 1/2 cups steak sauce
1 1/2 packages (18 oz) fusilli pasta
4 cubes chicken bouillon
2 Vidalia onions, diced
3-4 avocados - peeled, pitted and diced
2 cups halved cherry tomatoes
2 cups Ranch-style salad dressing (you may need a little more, depending on how "moist" you like your pasta salad)

Directions:

Preheat an outdoor grill for high heat. Place breasts into a glass baking dish and marinate in steak sauce for 15 to 60 minutes. Grill chicken until no longer pink and the juices run clear. Remove from grill, and chop into bite-size pieces.

To a large pot of boiling water, add bouillon cubes and pasta. Cook pasta until al dente. Drain, and rinse under cold water.

In a large bowl, combine chicken, pasta, onion, avocados and tomatoes. Mix in salad dressing, cover, and refrigerate until chilled.

Source: Sarah O'Brien

Taco Salad


I spent quite a while racking my brain, trying to think of a good lunch idea for yesterday afternoon. One of my really good friends was coming over for a long overdue playdate and I wanted to make sure that I made something that she would enjoy--and something that would be easy to eat, with five kids, ages four and under running around! I finally decided on this taco salad recipe, as it has always been a huge hit! My mother-in-law first made this shortly after my husband and I started dating and since then, it has been requested for quite a few get-togethers that I have attended and is CONSTANTLY requested by my husband's co-workers, every time they have a pitch-in at work. It does take a little while to cut up all of the veggies, but it's well worth it...trust me! You can put this together ahead of time (ie: the night before) and wait to add the Doritos, Italian dressing and cheese until right before serving. It's really good leftover, but just a suggestion...if you're making it for your family (as opposed to taking it to a pitch-in or get-together), my husband and I have found that it works out well to mix all of the ingredients together, minus the Doritos, Italian dressing and cheese and then just add each of those three ingredients to each person's individual bowl--that way, you avoid having an entire bowl of taco salad with soggy Doritos! If you are serving it for a get-together or pitch-in and have some leftover, we found that just adding some fresh Doritos "perks" it right back up! (I apologize for the picture...I took it after 11pm last night, when I finally got back home after running my errands and had a chance to sit down and eat my dinner!)

Taco Salad

1 large head of lettuce
1 large green pepper, diced
1 large sweet onion, diced
1 cucumber, diced
4 Roma tomatoes, diced
1 1/2 pounds ground beef
1 bag Doritos (crushed into small pieces)
1 bottle Italian dressing
1 bag shredded mild cheddar cheese (optional)

Directions:

In a large bowl, break apart lettuce. Add green pepper, onion, cucumber and tomatoes. Brown ground beef; drain fat and allow to cool. Add meat to salad mixture. Add Doritos, Italian dressing and cheese and mix well.

Note: We double the recipe if we're making it for a large group and it makes a good-sized bowl! Also, we have found that "off-brand" nacho-flavored chips often do not taste as good as the Doritos. By no means am I a "brand-snob"--I'm all about buying generic brands, but I am particular about a handful of things! I would suggest trying it for the first time with Doritos and then experimenting with other brands if you so desire. We have used the nacho-flavored chips from Aldi's and they honestly weren't bad!


Source: Esther Guajardo

Fudgy Brownies


Heidi, from Tried-and-True cooking with Heidi, posted this recipe on her blog at the most perfect time...right before I was having a playdate at my house! I had been trying to come up with some "kid-friendly" foods to make, since between my girlfriend and I, we were going to have a four year old, three year old, (2) 16 month old twins and a 14 month old. I whipped up these brownies in no time and stuck them in the oven right before they arrived--they were quite delicious, but with all of the initial chaos, I somehow missed my timer going off on my oven, so they were in a bit longer than they should have been. This was my first time making homemade chocolate brownies and I will definitely make these again...I may just try to make them before I have a house-full of kids!

Fudgy Brownies

2 cups sugar
1 tsp vanilla
1 1/4 cups flour
2 sticks butter
3 eggs
3/4 cup cocoa powder
1/4 tsp salt

Directions:

Preheat oven to 400. Grease an 8x8 baking dish. Mix sugar and cocoa in a medium bowl. Melt butter and add to sugar/cocoa mixture. Add eggs and vanilla and mix. Add flour and salt; blend until just smooth (don't over mix). Bake 40-50 minutes. You want center to still be a little wet when a toothpick is inserted and pulled out.

Source: Tried-and-True cooking with Heidi

Friday, May 1, 2009

The Passionate Blogger Award


My sister, Sarah, from Delectable Dining passed "The Passionate Blogger Award" on to me. Back in January, I believe, she suggested that I start blogging and sharing some of the new recipes that I had been trying and I can't begin to tell you how much fun I've been having! Not only have I had the opportunity to meet so many wonderful people through this experience, but I've forced myself to make it a point to try so many fantastic recipes that I've come across on my own and those that have been posted by fellow bloggers. I've always loved to cook, but once I had my kids, I started to feel a little overwhelmed and preoccupied with them. Blogging has become a fun new "hobby" for me and given me the chance to do two things that I truly enjoy...cooking and eating!


Along with this award, come the following rules:

1. Put the logo in your blog

2. Write five things you are passionate about apart from blogging

3. Tag 5 people on your lists and let them know you tagged them.

Hmmm...I'm going to try not to be too redundant since I just posted some of my personality traits in a previous post...

Five things I'm passionate about:

1) Family--I absolutely adore my family and would do anything for them. Now that I'm a little older (and wiser) I feel as if I'm gained such a greater understanding of the importance of family. Having two children of my own has been such a blessing! Don't get me wrong...my son gives me a run for my money, but I can't imagine my life without my children (and the rest of my family).

2) Photography--By no means am I anywhere remotely close to being a good "photographer", but I am never without my digital camera. I try so hard to capture all of those little "life moments"! I literally have thousands and thousands of pictures in storage bins that I need to sort through!

3) My profession--Trust me when I tell you...there are days where I want to pull my hair out at work, but I honestly have never once regretted becoming a nurse. Not to sound "corny", but I genuinely love helping others and making a difference in people's lives'. I've literally been brought to tears on several occasions, when patients or their family members will pull me aside and make a point to thank me for the care I provided. It's been such a rewarding and fulfilling job!

4) Cooking--I've always loved to cook, but my two children have really motivated me to be more "adventurous" when experimenting with different ingredients, as they are not the least bit picky. My husband has gotten MUCH better and has been willing to try things before deciding that he doesn't like them :) As mentioned before, I love finding new recipes, collecting cookbooks and trying out recipes posted by other bloggers.

5) Learning--I really enjoy learning new things, whether it be a new hobby, keeping up with nursing journals, etc. I feel as if I'm a very open-minded person and am always looking to acquire new knowledge.

I would now like to pass this award on to the following five people:

Cathy from Accountants can Cook?

Katie from Katie's Corner

Amanda from Amanda's Cookin'

"Nana" from Nana's Kitchen

Joyce from Justjoycee