Saturday, September 17, 2011

Kick Off with Haas Avocados Recipe Contest!

This is a Sponsored post written by me on behalf of Hass Avocado Board featuring Hass Avocados for SocialSpark. All opinions are 100% mine.

I LOVE avocados and look for any excuse to incorporate them into a recipe or meal!  We seldom have a family get-together that does not include a giant bowl of my Mom's guacamole, which is absolutely to die for!!!  Personally, I love to slice avocados and serve them with most any type of sandwich--especially a nice, grilled chicken sandwich!  Plus, you can never go wrong with a refreshing bowl of Avocado-Corn Salsa or adding chunks of avocados to quesadillas!  My mouth is watering just thinking about the endless possibilities!  What I love most about avocados is that not only do they enhance everything they are incorporated into, but they are exceptionally good for you!  One-fifth of a medium avocado (1 oz) has just 50 calories and contributes nearly 20 vitamins and minerals, making it a nutrient-dense food choice.  They're also wonderful in the sense that that they contribute to the "good fats" in one's diet.  Over 75% of the fat in avocados is unsaturated (monounsaturated and polyunsaturated fats), making them a great substitute for foods high in saturated fat.  

Now, onto the exciting part!  Hass Avocados is holding a "Kick Off with Hass Avocados Recipe Contest"!  There are 2 ways to participate:

(1) A weekly sweepstakes where they will give away a box of avocados for 14 consecutive weeks!  Every week during the course of the campaign, a box of Fresh Haas Avocados will be given away to one lucky winner.  That's 14 chances to win!!!!

(2) A recipe contest where the winner will win a trip for FOUR people to the Rose Bowl Game ®!  (This trip includes round-trip airfare, hotel accommodations, participation in a Rose Bowl Game ® Welcome Reception, admission to the "behind-the-scene" Rose Bowl Parade decorating site, sightseeing tour of Pasadena, admission to the Rose Bowl Game ® on January 2, 2012 and more!!!)  Just enter your Avocado Game Day Recipe in the contest and a screenshot of your contest entry in your post, if possible...it's as easy as that!

***For more information on how the winner is chosen, be sure to check out their Facebook page!***

I would very much encourage everyone to sign up (on the contest site) to receive free emails with recipe ideas and nutrition information--you'll receive great ideas once per month!  If you enjoy avocados as much as I do, you may also want to check out these avocado recipes and tailgating tips and recipes!  Enjoy!

Visit Sponsor's Site

Friday, July 22, 2011

Super Simple Chicken


Yet again, I have gone quite a long stretch without blogging, but things have been SUPER busy around here. My husband has officially been accepted into nursing school (and will start next month)--it's been quite a long journey, but there's FINALLY a light at the end of the tunnel! He'll graduate in May 2013 and I couldn't possibly be anymore excited--just two more years and then hopefully we can return to some degree of normalcy! He's taking two summer courses (both of which have required an ungodly amount of time), while we both work as much as possible and spend time with our two crazy little kids! Due to the fact that we're always running in different directions and we both work long shifts at the hospital (and get home generally after the kids are in bed), we haven't really had anything too fancy...hotdogs, pizza and tacos have been making regular appearances on my weekly menus, as have those quick, frozen skillet meals! Starting this Fall, I will be home Monday through Friday (and working weekends exclusively), so I will have MUCH more time to cook and experiment with new recipes--especially since my son will be going to school all day, starting this year, and it will just be my daughter and I home during the day. Bless her heart, she's got quite a little sweet tooth, so I'm sure you'll see an increase in my dessert posts, as well!

As for my recipe, I must admit...if I had my way, I normally would prefer to have my husband grill split chicken breasts! He always manages to cook them perfectly and I just prefer that "grilled" taste. Unfortunately, the night we made these, I knew he wouldn't be home until close to 8pm and since I had to be up for work at 4:30am, I didn't want to eat dinner too late. I generally don't have the best luck preparing baked chicken, especially bone-in chicken breasts...they tend to be on the drier side and not overly flavorful. This recipe, however, was the PERFECT alternative to grilling and will come in most handy in the winter. It took all of 5 minutes to prepare the chicken and while the original recipe stated that you should bake them for 1 hr to 1 hour and 15 minutes, I found ours to be fully-cooked after approximately 45 min. (Definitely watch them carefully!) I seasoned each breast very generously, with each of the seasonings and they were bursting with flavor and were so moist, that the juices immediately flowed out upon cutting into them. While I think the leftovers would be great reheated on a low oven, I'm actually looking forward to cutting them up and making a nice, hearty salad...sounds like a refreshing, light meal idea with this intense heat! I hope everyone is staying cool and enjoying their summer!

Super Simple Chicken

4 bone-in chicken breast halves, with skin
4 tablespoons butter
dried basil
thyme
garlic powder
Kosher salt
Pepper
1/4 cup lemon juice

Directions:

Preheat oven to 350 degrees F (175 degrees C).

Place chicken breasts in a lightly greased 9x13 inch baking dish. Add lemon juice to bottom of dish. Dot each breast with 1 tablespoon of butter or margarine, then season each breast generously, with each of the above seasonings.

Bake at 350 degrees F (175 degrees C) for approximately 1 hour. (Make sure to check around 45min to avoid over-cooking!)

Source: Adapted from Allrecipes.com

Tuesday, May 24, 2011

Parmesan-Crusted Pork Chops


Grocery shopping has become one of my ultimate frustrations lately, as the prices of fresh meat/poultry/fish are nauseating! We've about had our fill of chicken, so I spent a little more than I normally would on a family-sized package of center cut pork loin chops. I figured the pork would be a bit healthier than red meat and ever since I tried breaded pork chops not that long ago, I have been in search of other variations. I realize I just posted a Parmesan Baked Perch recipe, so I apologize for the back-to-back "Parmesan-themed recipes", but I knew I couldn't go wrong with a recipe from Giada! My husband and I both felt that this recipe was a keeper and my son loved these chops so much that he even requested a second one! This is definitely another great, quick, weeknight meal!

Parmesan-Crusted Pork Chops

2 large eggs
1 cup dried Italian-style bread crumbs
¾ cup freshly grated Parmesan
4 (1/2 to 3/4 inch thick) center cut pork loin chops
salt and pepper
3 tablespoons olive oil
*optional lemon wedges for serving*

Directions:

Whisk the eggs in a shallow bowl to blend. Place the bread crumbs in another shallow bowl or plate. Place the parmesan cheese in a third shallow bowl or plate. Sprinkle the pork chops generously with salt and pepper. Coat the chops completely with the cheese, patting to adhere. Dip the chops into the egg, then coat completely with the bread crumbs, patting to adhere.

Heat 3 tablespoons olive oil in a large skillet over medium heat. Add the pork chops, in batches if necessary, and cook until golden brown and the center reaches 150 degrees, about 6 minutes per side. Transfer the chops to a plate and serve with lemon wedges.

Source: Giada De Laurentiis (Foodnetwork.com)

Sunday, May 15, 2011

Baked Parmesan Perch


Well, I went grocery shopping the other day and as usual, only chicken was on sale, so as I was attempting to make room in my freezer for the random frozen items I purchased, I found a bag of perch. By no means am I a "food snob", but I'm finding it quite difficult to find frozen fish that I really enjoy. The bottom line is that nothing beats fresh fish--it's just hard to rationalize spending $7-$10/lb, while on a budget! I'm hoping against hope that trout or salmon goes on sale in the near future--not only because I'm desperately craving them, but because I have a couple of REALLY good recipes to share and they won't be near as good on frozen fish. As far as this recipe is concerned, I actually was pleasantly surprised at how flavorful the fish was and it was SO easy! Another recipe I will be adding to my rotation, especially when I'm in need of a quick weeknight meal!

Baked Parmesan Perch

1/4 cup dry bread crumbs
3 tablespoons grated Parmesan cheese
1 tablespoon paprika
1 teaspoon dried oregano
1 1/2 teaspoons lemon pepper seasoning
1 pound perch or fish fillets of your choice
3 tablespoons butter or margarine, melted

Directions:

In a shallow bowl, combine the bread crumbs, Parmesan cheese, paprika, oregano and lemon pepper seasoning. Brush fish fillets with butter, then dip into the crumb mixture. Place in a greased baking pan. bake, uncovered, at 500 degrees F for 10 minutes or until fish flakes easily with a fork.

Source: Adapted from allrecipes.com

Monday, May 9, 2011

Chicken Scampi


First of all, I seriously have every intention of posting some beef recipes just as soon as our local stores have reasonable prices! I can't quite psych myself up to spend $3/lb for regular ground beef...not even ground chuck! Even chuck roast has been $4-ish a pound...RIDICULOUS! Chicken happens to be the only thing on sale these days and I have to stick to my budget! I am so very proud to announce that my husband got straight A's this semester, so this was our celebratory meal in his honor :) Now, we just have to wait another few weeks to find out if he gets accepted into nursing school to start this Fall. If he receives an acceptance letter, I'm most definitely splurging on some good steaks!!! I also will remain on the hunt for quick weeknight meal ideas, because I'm hoping to work a ton to sock away money for next semester--if anyone has any ideas, please do share!

As for this recipe, I found it to be very simple to prepare and was a huge hit with my family. My husband polished off his plate and I think he took the leftovers for work today and my son requested seconds the night I prepared it. I followed the basic recipe on allrecipes.com, but tweaked it a bit. Would definitely make it the very same way next time! If you enjoy garlic and Italian-style food, this recipe will be right up your alley! (Oh, and did I mention that from start to finish, it took all of 25 minutes?!?)

Chicken Scampi

1/2 cup butter or margarine (1 stick)
1/3 cup olive oil
1 teaspoon dried parsley
1 teaspoon dried oregano
6 cloves garlic, minced
1 teaspoon sea salt
1 1/2 tablespoons lemon juice
1/4 cup white wine
1 1/2 pounds chicken tenderloins (I happened to use these, because they were on sale for the same price as the boneless, skinless chicken breasts, but you could actually just use the boneless, skinless chicken breasts and cut them into 1 inch wide strips)

Directions:

In a large skillet, heat the butter or margarine and oil over medium high heat, until the butter/margarine melts. Add the parsley, oregano, garlic and salt and mix together in the skillet. Stir in lemon juice and white wine.

Add the chicken and saute for about 3-4 minutes or until chicken turns white on the outside. Lower the heat and cook for about 10 to 15 minutes or until chicken is cooked through and the juices run clear. (Watch the chicken carefully...mine was done in closer to 10 minutes). ***Also, you may have to add additional butter/margarine, while the chicken is cooking--I added an extra 1/2 stick***

Serve over pasta or rice. I used one pound of thin spaghetti, because I didn't have any angel hair on hand--this was more than enough for my family of 4.

Source: Adapted from allrecipes.com

Thursday, May 5, 2011

Chicken with Rosemary-Onion Sauce


Anytime I see someone post a recipe that is a "quick weeknight meal" idea, I immediately jump on it--especially when it's endorsed by someone like Krista, of Krista's Kitchen! I have yet to try a recipe of Krista's that I have disliked! I actually intended to make this about a week ago, but had yet another "incident" with chicken I purchased at Meijer. It was marked "sell by April 30th" and seeing as how I was preparing it April 27th, I hardly anticipated my chicken smelling like rotten eggs when I opened the package. NOT a happy camper--especially because this was not the first time I've had a problem with their meat/poultry!

I have to laugh now (although I wasn't finding it overly amusing the night I made it), but looking back at Krista's post regarding the meal, she mentioned that her kids were not big fans of the "gravy". Ironically, my kids and I all really enjoyed the chicken, "gravy" and all (although I did put it sparingly on my kids' chicken)--it was my husband who didn't seem to care for it. (Not overly surprising--he's the pickiest eater in our home!) He thought the onion flavor was "too overpowering". Here's the thing...I fully admit that I've had onions that were VERY strong and while I happen to enjoy the flavor of onion, there have been times in which I've scraped off some excess, because it was in fact "too overpowering". By no means did I think the onion flavor was too much--it was actually a very mild onion. He kills me, too, because he asked me "are the onions cooked?". Ummmm...yeah...by TWO different methods! Not only did I saute them, but they were then baked within the sauce for about 25 minutes while my chicken was in the oven. (He even watched me take the chicken out, with the sauce covering it!) I love him dearly, but he drives me crazy sometimes!!! I've mentioned this in prior posts, but before we started dating (about 10 years ago), he literally ate the same 3-4 meal rotation. He NEVER would have considered eating onions before I started cooking for him, but he will eat them in certain dishes now. As far as this dish is concerned, I'm honestly not sure if it was more in his head, just because he previously had himself convinced that he didn't like onions and this chicken was obviously smothered in them. If he'd be willing to try it again, perhaps I'll try a Vidalia onion...doesn't get much more mild than that! In the meantime, I'm going to enjoy devouring the leftovers, all by myself :)

Just one more thing before I post the recipe! This potentially could be a fairly healthy recipe if you follow it according to how Krista posted it. I used what I had on hand, as opposed to making a point to pick up reduced-sodium chicken broth and fat free milk. (I'm awful, I know!)Chicken with Rosemary-Onion Sauce

4 boneless skinless chicken breast halves (I used about 2 lbs)
1/2 teaspoon salt
1/4 teaspoon pepper
3 teaspoons butter, divided
1 medium onion, chopped
1 garlic clove, minced
4 teaspoons all-purpose flour
1/2 cup reduced-sodium chicken broth (I used regular chicken broth)
1/2 cup fat-free milk (I used 2%...that's all I had!)
1 teaspoon dried rosemary, crushed

Directions:

Sprinkle chicken with salt and pepper. In a large nonstick skillet,
brown chicken in 1 teaspoon butter. Transfer to an 11-in. x 7-in.
baking dish coated with cooking spray.

In the same skillet, saute onion and garlic in remaining butter until
tender. Stir in flour until blended. Gradually stir in broth and
milk. Add rosemary. Bring to a boil; cook and stir for 2 minutes or
until thickened.

Pour sauce over chicken. Cover and bake at 350° for 20-25 minutes
or until chicken juices run clear. Yield: 4 servings.

Source: Krista's Kitchen (originally from Light and Tasty Magazine)

Monday, April 25, 2011

Breakfast Casserole


As you've likely noticed, I'm somewhat behind on my posting AGAIN! The time is just constantly getting away from me--it seems like it was just January and I was feeling as if this semester would drag by for my husband, but here we are and he's getting ready to take his finals next week! It's been somewhat challenging coordinating our schedules, between his schooling and our jobs, but despite my lack of posts, I have actually been trying new recipes here and there! I have several recipes that I need to just sit down and post very shortly, but in the meantime, I thought I'd at least get started with this. I'm guessing there are many of you who had ham for dinner last night and this is a great way to utilize your leftovers! I first tried this casserole the weekend of my kids' birthday party...back around my last post! We had my kids' party on Saturday and then had a brunch in honor of my parents' birthdays on Sunday. I took one bite of this casserole and LOVED it! I've tried other breakfast casseroles in the past and "liked" them, but never found one that I was overly crazy about. One thing I've found with the majority of breakfast casserole recipes is that they call for white bread and at least in my experience, I've found that it gets very soggy and there's nothing I despise much more than soggy bread! My sister made this casserole again for a brunch in honor of my grandmother's 80th birthday, a couple of weeks ago, and as soon as I took that first bite, I was already trying to think of a perfect opportunity to make it again. The recipe actually calls for ham, which is how I had it the first two times. I made it for brunch yesterday morning and used bacon instead, since my husband does not care for ham. (He hadn't tried it the first two times, because of the ham and I knew he'd like it if I made that one little substitution!) To be completely honest, I preferred the ham. It's not that the bacon wasn't "good", but I just seemed to enjoy the ham more. Had I not been making this casserole primarily for my husband and I, I would have even liked to have added some veggies--maybe some mushrooms, green peppers and onions. (There's NO way my husband would have eaten it, though, had I gone that route!) The recipe calls for hash brown patties as the base and a fair amount of cheese, so it's pretty rich in and of itself. I would definitely recommend it for a brunch or even for a breakfast potluck :) It's SO very easy to assemble and can even be prepped the night before!

Breakfast Casserole

8 frozen hash brown patties
4 cups shredded Cheddar cheese
1 pound diced/cubed fully cooked ham
8 eggs
1 cup milk
1/2 teaspoon salt
1/2 teaspoon ground mustard

Directions:

Place hash brown patties in a single layer in a greased 13-in. x 9-in. x 2-in. baking dish. Sprinkle with cheese and ham.

In a bowl, beat eggs, milk, salt and mustard. Pour over ham.

Cover and bake at 350 degrees for 1 hour. Uncover; bake 15 minutes longer or until edges are golden brown and a knife inserted near the center comes out clean.

Source: Sarah O'Brien (originally from Taste of Home)

Wednesday, March 16, 2011

Homemade Pizza Crust and Simple Pizza Sauce


My husband and I had been trying so hard to come up with the perfect menu for our kids' combined birthday party this past weekend. I'm not exactly sure what prompted my initial thought, but I started thinking that it might be fun to set up a "make-your-own-pizza" table and allow for a more interactive party, also giving each person the opportunity to have exactly what they wanted! Ordering pizzas was one of our initial considerations, but I always worry that someone may not like what I choose to order or we may run out of a particular variety of pizza that is more of a "hit", forcing people to eat what's left. One of my biggest concerns was selecting a pizza crust. I've never made homemade pizza dough as an adult, so my natural inclination was to purchase something like Boboli (or something of that sort). Then, at just the perfect time, I saw a recipe posted on Macaroni and Cheesecake for a thin crust pizza and easy homemade pizza sauce, originally taken from Annie's Eats. I was all set to make this particular pizza crust recipe, but knew the week of the party was going to be chaotic and was concerned that I wouldn't have enough time to make the dough ahead of time to try it out (primarily to familiarize ourselves with what we were working with so we didn't have a disaster on our hands the day of the party!). I linked directly to Annie's Eats and found another pizza dough recipe that she spoke very highly of and it just so happened that this recipe could be made within a few hours...as opposed to having to make it and allow it to sit in the fridge for at least 24 hrs. We tried this recipe a few days before the party and were amazed at how easy it was to make the dough and even more so by how great the pizza tasted! While I did greatly enjoy this recipe and would recommend it/make it again, I am kind of anxious to try the initial thin crust recipe that I saw on Macaroni and Cheesecake. This definitely is a more substantial dough--much more like a hand-tossed. The recipe, as written, makes (2) medium pizzas or (4) calzones. We made (4) individual sized pizzas from each recipe, but they were PLENTY filling...most everyone had some left! The sauce recipe was incredibly easy, as well, but if you don't want to mess with making your own, you could always use your own store-bought sauce. It seriously is SO easy, though and takes all of maybe 5 minutes to prepare! All in all, I think the pizza idea was a huge success...the only problem was that I desperately needed a double oven, but everyone patiently waited and made their pizzas in shifts :) Definitely consider trying this recipe out, instead of buying store-bought crust next time!


Homemade Pizza Crust and Simple Pizza Sauce

½ cup warm water
2¼ tsp. instant yeast
4 cups (22 oz.) bread flour, plus more for dusting
1½ tsp. salt
1¼ cup water, at room temperature
2 tbsp. extra-virgin olive oil

Directions:

Measure the warm water into a 2-cup liquid measuring cup. Sprinkle the yeast over the top. In the bowl of a stand mixer fitted with the paddle attachment, combine the bread flour and salt, mixing briefly to blend. Measure the room temperature water into the measuring cup with the yeast-water mixture. With the mixer on low speed, pour in the yeast-water mixture as well as the olive oil. Mix until a cohesive dough is formed. Switch to the dough hook. Knead on low speed until smooth and elastic, about 5 minutes. Transfer to a lightly oiled bowl, turning once to coat. Cover with plastic wrap and let rise until doubled in size, 1½-2 hours.

Press down the dough to deflate it. Transfer the dough to a lightly floured work surface. Divide the dough into two equal pieces. Form each piece of dough into a smooth, round ball. (If freezing the dough, wrap in plastic wrap and freeze at this point.) Cover with a damp cloth. Let the dough relax for at least 10 minutes but no longer than 30 minutes.

To bake, preheat the oven and pizza stone to 500˚ F for at least 30 minutes. Transfer the dough to your shaping surface, lightly sprinkled with cornmeal. Shape the dough with lightly floured hands. Brush the outer edge lightly with olive oil. Top as desired. Bake until the crust is golden brown, and cheese is bubbling, 8-12 minutes.

For the sauce:

1 (28 oz.) can whole peeled tomatoes, drained
1 tbsp. extra-virgin olive oil
1 tsp. red wine vinegar
2 cloves garlic, minced or pressed
1 tsp. salt
1 tsp. oregano
¼ tsp. ground black pepper

Directions:

Combine all ingredients in a food processor. Blend until smooth, about 30 seconds. Transfer to a bowl or container and refrigerate until ready to use.

Source: Annie's Eats

Wednesday, March 9, 2011

The LARABAR Experience

This is a Sponsored post written by me on behalf of LÄRABAR for SocialSpark. All opinions are 100% mine.

I was not the least bit familiar with LÄRABAR products until just recently and must admit, I was completely in awe of the simplicity of ingredients.  Being a registered nurse, I do try my hardest to ensure that my family eats as healthily as possible, but that's often rather difficult when you have a 3 and almost 6 year old and a husband who craves anything and everything sweet and/or salty!  I have spent a great deal of time looking at various "fruit and nut" bars at our local grocery stores, however, it's quite unsettling when you begin to read the lengthy list of ingredients.  It's often hard to decipher just how "healthy" certain bars are, when you see countless ingredients that you cannot even recognize.  Upon receiving 13 different flavors of LARABAR products to sample, my husband and I were shocked at the fact that all of the bars contain only 2-9 ingredients--all of which are all natural, have no added sugars or sweeteners and no preservatives, fillers or colorings.  As if that is not remarkable enough, the majority of the bars are gluten free, soy free, dairy free, vegan, Non-GMO, and Kosher.  I do want to note, though, that the chocolate chips in the three chocolate chip flavor varieties are made with Fair Trade Certified chocolate, sugar, cocoa butter and vanilla and while no dairy is use to make their chocolate chips, they are made on a line that also produces chocolate chips that are in fact made with dairy products.  LARABAR does not claim that these three varieties of bars (containing the chocolate chips) are dairy free, soy free or vegan and they do contain cane sugar, as well. 

I'm not sure if any of you are fans of the show "The Biggest Loser", but these bars were actually featured on the show on Wednesday, March 8, 2011 by trainer Brett, with contestants Ken, Rulon and Justin.  Just to give you a little background information on LARABAR, it was founded in 2003 by Lara Merriken.  LARABAR currently produces 19 flavors and the company prides itself on producing simple, whole food products.  The bars are available worldwide at not only specialty retailers, but conventional grocers, as well.  The bars range in cost from $1-$2 each.  When you take into account the fact that you're truly getting a very nutritious snack with all natural ingredients, it's hard to put a price tag on that!  As you all know, my family is living on a budget now, with my husband being back in school full-time, but I found these bars on Amazon.com for an average of $1.30/bar.  Regarding the flavors, I have to be brutally honest.  I sampled quite a few of the flavors and found many to be a bit on the bland side, however, I did like the Peanut Butter Cookie variety.  I asked my husband to rank his top three favorites and he agreed that the Peanut Butter Cookie was his favorite, followed by Chocolate Chip Brownie and Cookie Dough.  We both agreed that the Cashew Cookie was our least favorite. 

Larabar.com is currently offering a coupon for $1 off 2 LARABARS and I would recommend that you give them a try!  I'll be anxious to hear which varieties you all enjoy!

get your LÄRABAR coupon


Visit Sponsor's Site

Tuesday, March 8, 2011

Simple Split Chicken Breasts


If nothing else, I can always count on at least one local grocery store to have split chicken breasts on sale every week--generally for $.99/lb. While we really do love red meat, we've been attempting to eat more healthy. Boneless, skinless chicken breasts may be a bit more versatile, but split chicken breasts are usually about half the cost and the skin and bone really do tend to keep the chicken more moist and flavorful! My husband has a knack for making GREAT grilled split chicken breasts, but the thought of grilling in this cold and gloomy weather didn't really appeal to either of us. I searched on allrecipes.com first and nothing really caught my eye, so I turned to google for a more broad search! I've never seen this particular blog before, but quite a few people commented on the chicken after trying it and it got rave reviews! My husband, kids and I all felt that it was exceptionally moist and tender, which can be hard to achieve when baking split chicken breasts. I'm not sure that I was as in love with this recipe as some of the other reviewers...I kind of wished the flavor had permeated down further into the chicken, but all in all, it was an easy dish that I would make again. Perhaps had it not been SO hyped up, I would have thought more highly of it! Just like with anything, when you expect something truly outstanding, right off the bat, it's a little disappointing when it doesn't quite meet your expectations.

***Before I get to the recipe, I wanted to let you all know that I recently was informed of a site by a friend of mine, that offers the opportunity to write reviews about different products. My first sponsored post is due to be published on my blog within the next day or two. I started this blog as a hobby and while I am excited to have the opportunity to review different products, I fully intend to keep my blog pertaining to food and money saving ideas for people living on a budget. Now on to my recipe...***

Simple Split Chicken Breasts

3-4 lbs split chicken breasts (4 breasts)
olive oil for brushing
1 1/2 tsp Kosher salt
1 1/2 tsp garlic powder
1 1/2 tsp onion powder
1 tsp paprika (or 1/2-3/4 tsp cayenne pepper if you prefer a little heat!)

Directions:

Preheat the oven to 350 degrees. Wash the chicken breasts and pat dry with a paper towel. Lightly coat the chicken skin with olive oil. Combine Kosher salt, garlic powder, onion powder and paprika (or cayenne pepper) in a small bowl; season chicken generously on both sides, carefully lifting the skin and placing the spice mixture under the skin, as well. Place chicken breasts on a rack in roasting pan and bake for 1 hour. Let sit 10 minutes before serving!

Source: Adapted from Cooking with Baby

Wednesday, March 2, 2011

Roasted Pork Loin with White Wine Sauce


Have you ever found that there's been one particular cut of meat that you really struggle to prepare perfectly?!? I've found that pork loin is one of my most problematic foods! I've always struggled to make sure that it's cooked enough (especially since I don't care to eat undercooked pork), but not so much that it's dry and flavorless. I just can't seem to find that "happy medium"! I will tell you, though, that this particular recipe came out PERFECTLY! I was so very proud of myself--it was about time that I got it right, seeing as how this is likely about the 6th or 7th time that I've made a pork loin roast. Here's the thing, though...the original recipe said to cook a 2 pound pork loin roast for about 2 hours. Thankfully, I used my digital thermometer and did a little research, as that seemed as if it was way too long of a cooking time. I found several sources that stated that as a rule of thumb, pork should be cooked approximately 25-30 minutes per pound. I set my digital thermometer to alarm when my pork reached 160 degrees, so you can imagine my surprise when it started beeping about an hour into the cooking time--especially since it was almost a 4 1/2 pound roast! This goes back to why I struggle so much with pork loin--I adjusted the thermometer a bit and all of a sudden, the temperature started dropping. I don't know if I didn't have it deep enough or if it was resting against a portion of the pork that just happened to be hotter than the rest, but it did take about 1 3/4 hrs. The pork was excellent--so very moist, which can be hard to accomplish with such a lean piece of meat. Here was my one gripe about this particular recipe and actually, it has nothing to do with the recipe itself. My husband and I are completely oblivious when it comes to wine--we wouldn't have a clue if we were drinking an expensive glass of wine, versus a $3 bottle...we're not the least bit savvy when it comes to wine! Give us a mixed drink and we're happy :) Anyway, I had purchased a relatively inexpensive bottle of white wine to use for cooking a little while back and used the remainder for the sauce. I did enjoy the concept of the wine sauce and thought it had a great deal of potential, but I would be most appreciative if someone would offer a suggestion for a good cooking wine! My husband and I weren't overly fond of the very distinctive wine flavor and I know it had to be related to the quality. I hope you enjoy and I will be anxious for feedback regarding a good wine to cook with!

Roasted Pork Loin with White Wine Sauce

8 cloves garlic, minced
1 tablespoon dried rosemary (I used a Rosemary and Garlic Seasoning)
salt and pepper to taste
1/3 cup olive oil
4 pound boneless pork loin roast
1 to 1 1/2 cups white wine
2 tablespoons flour

Directions:

Preheat oven to 350 degrees F (175 degrees C). Combine olive oil, garlic, rosemary, salt and pepper in a small bowl, making a paste. Place pork loin roast in a baking dish and cut 1/2 inch slits all over roast; cutting relatively deep into the meat to make little pockets. (My slits were about an inch apart). Insert the paste deep into each pocket and then rub the remaining oil and spice mixture over the entire roast.

Place pork loin into oven (fat side up) and loosely cover. Cook until the pork reaches 160 degrees or is no longer pink in the center. (My pork loin took about 1 3/4 hours and I used a digital thermometer to monitor it closely. Make sure the thermometer is placed in the very center of the roast!) Remove roast and place on a dish or platter, allowing to rest for approximately 15-20 minutes. Add the wine to the baking dish and stir to loosen the browned bits. Whisk in 2 tablespoons of flour to thicken the sauce. Place baking dish back in oven (on 350 degrees) and allow sauce to come to a boil and thicken. (I left mine in for about 20 minutes, while my pork was resting). Cut pork loin into 1/2 inch thick slices and serve with wine sauce. I would suggest serving with mashed potatoes :)

Source: Adapted from Allrecipes.com

Friday, February 25, 2011

Salmon with Lemon and Dill


My husband and I always talk about eating more fish, but lately, it's been so expensive! We had been on a Tilapia kick for a while, but I picked up some frozen salmon the last time I was at the store and thawed it out for a quick weeknight meal last night. (My husband had a late class and I didn't want anything too heavy, that late at night!) Don't get me wrong, I much prefer fresh fish, but we've been relatively pleased with most of the frozen fish that we've bought...especially those that come in their own little vacuum-sealed packages. I can't honestly say that I was overly pleased with the brand we had last night, but I'd really like to try this recipe with fresh salmon, if and when it ever is on sale! I think a big part of the problem was that the salmon cooked a lot more quickly than I anticipated, so it may not have even been an issue with the brand. I had (4) 4 ounce pieces and wish I had checked the salmon after about 18-20 minutes. The recipe states to cook it for about 25 minutes, but that probably would have been a more accurate time if I used
(2) 8 ounce fillets. Either way, though, I'd suggest checking it after about 20 minutes to avoid overcooking the salmon! We both really enjoyed the lemon butter flavor and definitely will try this again!

Salmon with Lemon and Dill

1 pound salmon fillets
1/4 cup butter, melted
5 tablespoons lemon juice
1 tablespoon dried dill weed
1/4 teaspoon garlic powder
sea salt to taste
freshly ground black pepper to taste

Directions:

Preheat oven to 350 degrees F (175 degrees C). Lightly grease a medium baking dish.

Place salmon in the baking dish. Mix the butter and lemon juice in a small bowl, and drizzle over the salmon. Season with dill, garlic powder, sea salt, and pepper.

Bake 25 minutes in the preheated oven, or until salmon is easily flaked with a fork.

Source: Allrecipes.com

Friday, February 18, 2011

Chicken, Bacon and Avocado Quesadillas


I've expressed in previous posts that I'm not a huge fan of more authentic Mexican food, but I do love fajitas and quesadillas--they were two of my biggest pregnancy cravings! Prior to having kids, my husband and I used to go out to dinner at least a few times a month, but since the two little rugrats have arrived, it's been a bit more challenging to eat out. Not only do they get antsy, which makes it difficult to relax and enjoy dinner, but it's rather costly to take a family of four out to dinner these days! Short of going to the Chinese buffet on "kids eat free" night, we very seldom go anywhere else. I saw that Cassie (of Cassie Craves) had posted a recipe for quesadillas that quickly caught my eye! Not only do I love quesadillas, but how can you possibly go wrong with combining chicken, bacon and avocado?!? I took her general concept to use those three key ingredients and altered the recipe a little in terms of ingredients and the cooking method, but oh, my...these were delicious and certainly as good (if not better) than any I had eaten out! I tried to estimate about how much each quesadilla cost to prepare and I think I figured it was around $4-$4.50/each, which is probably less than half of what you'd pay to eat them out! Plus, they were SUPER hearty the way that I made them and I honestly couldn't eat more than half of one...they were really rich! I did serve Spanish rice as a side dish, so honestly-speaking, I would think that if you prepared them as heartily as I did, they could easily feed 3 people...especially if you serve them with a side dish! Also, I baked my bacon, which is now my preferred way to make it! Not only is it a bit healthier than frying, but it tastes just as good to me and you don't have to deal with the mess! I used a grill pan for my chicken and a griddle to cook the quesadillas, but if you don't have either of those, you can always grill your chicken on an actual grill or you may want to refer to Cassie's recipe, as I believe she actually fried her bacon and then cooked her chicken in the same pan. As for the griddle, you could always just use a frying pan/skillet! One last thing: I did leave the avocado off of my husband's, because he had his mind made up that he didn't care much for avocado, but I left a little separate and when he tried it with his quesadilla, he said "it honestly isn't too bad"--which means "I actually like this, but am not going to give you the satisfaction of admitting that you may have been right all of these years". :) Enjoy!

Chicken, Bacon, and Avocado Quesadillas

4 burrito-sized flour tortillas
2 large boneless, skinless chicken breasts
Salt, pepper and garlic powder to taste
8 strips of bacon, chopped
1/4 - 1/3 cup diced red onion (I only had yellow onions on hand, so that's what I used, but I tend to prefer red!)
1 avocado, diced
8 ounces Colby Jack cheese (2 cups)

Directions:

Preheat oven to 400 degrees. Place bacon on a foil-lined cookie sheet and bake for approximately 15 minutes, or until crispy. (Place on paper towel to drain, after removing from oven).

While bacon is cooking, pound chicken breasts to 1/3 inch thickness and season with salt, pepper and garlic powder. Place in greased grill pan and cook for approximately 5-6 minutes on each side or until no longer pink on the inside and juices run clear.

Remove chicken from pan and allow to rest for 5 minutes. Add diced onion to grill pan and cook for 2-3 minutes or until slightly tender, stirring frequently; remove from heat. Cut chicken and bacon into small pieces/chunks.

Preheat griddle to 250 degrees. Butter four tortillas on one side and place two on heated griddle, butter side down. Top each tortilla with cheese, chicken, bacon, onion and avocado, dividing the chicken, bacon, onion and avocado equally between the two. Sprinkle with more cheese and top each with another flour tortilla (butter side up). Cook each quesadilla until browned and crispy and cheese is completely melted, approximately 3-4 minutes on each side. ***To flip, my husband put a plate over the quesadilla and carefully used a spatula to flip each one onto the plate and then back on the griddle to cook the other side.***

Serve with sour cream, if desired.

Source: Inspired by Cassie Craves

Monday, February 14, 2011

Happy Valentine's Day and an Award!


First of all, I would like to wish everyone a Happy Valentine's Day!!! Secondly, I would like to thank Angie, from "Angie's Kitchen" for awarding me with the Stylish Blogger Award! It means so very much to know that she thought highly enough of my blog to acknowledge it, especially with all of the wonderful blogs out there! This is my second year blogging...I started as somewhat of a hobby and as I've mentioned before, it's been very therapeutic for me. When I'm stressed out, I either cook or clean--you can likely guess what my preference is! All kidding aside, I have "met" some very outstanding and inspirational people and have had so much fun experimenting in my kitchen! I've even been able to probably quadruple what my husband would eat when we initially started dating! I thank all of you for sharing your wonderful recipes/posts! I am new to Angie's blog, but have already bookmarked several recipes that I intend to try and thank her, again, for thinking of me!

Here is how the award works:

-Thank and link back to the person who awarded this to you.
-Share 7 (random) things about yourself.
-Pay it forward to 10 bloggers whom you feel are deserving.
-Contact those bloggers and let them know about their award.

Seven Random things about myself:

1.) I am addicted to coupons...seriously! I have a HUGE binder filled with hundreds (and I mean hundreds) of coupons, all categorized nicely and I will spend HOURS at the grocery store, going up and down each aisle trying to find bargains!

2.) I worked two part-time jobs in high school, one of which was at McDonald's. They would NOT "promote" me to drive-thru or to work the counter...I was the "fry girl" and despised it! It wasn't so funny at the time, but I have to laugh now when I think back to the day I called in and quit, letting them know that I wasn't coming in that night or EVER again! The manager said "for future reference, you may want to give your employer a little bit of notice". Sorry, being a "fry girl" wasn't really my thing and I didn't plan to use McDonald's on my future resume, when I applied for my first job as a nurse! (Especially since my job description would have stated "made fries"!)

3.) My husband and I grew up living about 20 minutes apart, but didn't meet until we were both down at IU Bloomington. (Small world!)

4.) I save every greeting card that I'm given...I'm not joking when I say that I probably have about 4-5 HUGE storage containers filled with cards. I'm very sentimental!

5.) I am so very blessed to be able to stay home with my kids as much as I do! My husband and I have always been able to work it out so that one of us can be home with the kids, avoiding daycare/babysitters altogether. Wouldn't trade it for the world!

6.) I apparently am "left-brain dominant"...I discovered this after taking a little quiz last week! Not surprising at all!

7.) I'm a huge fan of online shopping...and I LOVE Ebates! I just received a free $10 and change for this past quarter ($85 total), just for going to their site before starting my shopping! (If you want more info, contact me...it's great!!!)

I would now like to pass this award on to some of my favorite blogs that I read routinely--the first 9 are cooking blogs and the last is my dear friend, Devonay, who has a little bit of everything!

1) For the Love of Cooking
2) Lynda's Recipe Box
3) Finding Joy in My Kitchen
4) Tried-and-True Cooking with Heidi
5) Indigo's Sugar Spectrum
6) Recipe Shoebox
7) Amanda's Cookin'
8) One Perfect Bite
9) Macaroni and Cheesecake
10) Lumpkin and Me

Friday, February 11, 2011

Island Chicken


I have NEVER seen my kids inhale their dinner as quickly as they did the night I made this chicken! Being 2 and 5, I always get their plates ready and cooled, before fixing our plates. My children were asking for seconds before my husband and I even sat down...they had polished off their entire plates! (Not only the chicken, but their mashed potatoes and broccoli!) This recipe comes from "Annie's Eats". Her dishes always look absolutely delicious, but having a picky husband has somewhat limited the recipes on her blog that I am able to try! I bought a family pack of boneless, skinless chicken breasts and had four left to use, so this seemed like the perfect recipe to suit my whole family! While I never doubted for a second that this recipe would be "good", I couldn't get over just how good it was...it was unbelievably easy and the ingredient list was quite short and consists of ingredients that the majority of you have at home already! As soon as I dropped my son off at school, I mixed the marinade ingredients in a ziploc bag, added the chicken, stuck the bag in the refrigerator and didn't have to do anything else with the chicken, aside from sticking it in a baking dish and baking for 45 minutes! As mentioned above, we served with mashed potatoes and broccoli, per Annie's suggestion!

Island Chicken

½ cup vegetable oil
3 tbsp. lemon juice
1½ tbsp. soy sauce
1 clove garlic, minced or pressed (I added about 3-4 cloves...I LOVE garlic!)
½ tsp. dried oregano
¼ tsp. salt
Freshly ground black pepper
4 chicken breasts (about 2 lbs)

Directions:

Combine all ingredients except chicken in a mixing bowl or large airtight plastic bag. Whisk or shake well until the marinade is well mixed. Add the chicken breasts to the bowl or plastic bag so that they are covered by the marinade. If using a bowl, cover tightly with plastic wrap. If using a plastic bag, press out all the excess air and seal the bag tightly. Refrigerate and marinate up to 10 hours.

When ready to cook the chicken, preheat the oven to 350° F. Place the chicken breasts in a baking dish and pour the excess marinade over them. Bake in the oven until cooked through and the internal temperature reaches 165° F, about 45 minutes (exact baking time will depend on the size of your chicken pieces.) Remove from the oven and let rest for 5 minutes before serving.

Source: Annie's Eats

Tuesday, February 8, 2011

Chocolate and Peanut Butter No-Bake Cookies


Due to the nasty ice storm we experienced this past week, school was canceled four days in a row for my son. That made for a very happy mommy and little sister...we miss Jake now that he's in kindergarten and know it will be even worse next year, when he goes all day! On that note, while it was fun having everyone home together, it did get a bit stir-crazy at times--both of my children have an ungodly amount of energy! As a diversion, I decided it would be fun to make cookies--the kids LOVE helping! Since we were pretty much stuck at home, I knew I had to work with what we had available in the cupboard. I immediately thought about making chocolate no-bake cookies, since I just bought a container of quick oats. I remember both my mom and grandma making these cookies when my sisters and I were little, however, I couldn't seem to find the recipe anywhere...I know it's in one of the homemade cookbooks (containing recipes from family and friends) I was given at one of my bridal showers! My kids were quickly growing impatient, so I did a quick search online and found countless versions of the recipe, the majority containing peanut butter. I was somewhat intrigued by the addition of peanut butter, because my mom and grandma had never used it in their recipe and my children could sit and eat peanut butter right out of the jar! The cookies were a huge hit with my kids and husband--they're super easy and will definitely satisfy your sweet tooth!

Chocolate and Peanut Butter No-Bake Cookies

1/2 cup butter or 1/2 cup margarine (I personally prefer margarine for this recipe!)
2 cups sugar
1/2 cup milk
4 tablespoons cocoa
1/2 cup creamy peanut butter
3 cups dry quick-cooking oats
2 teaspoons vanilla

Directions:

Add the first four ingredients into a 2 1/2 to 3 quart sauce pan. Bring to a rolling boil and continue to boil for 60-90 seconds. Remove from heat and add the peanut butter, oats and vanilla. Using a tablespoon, spoon onto waxed paper and allow to cool for approximately 2 hours. Store in refrigerator.

(Makes approximately 3 dozen cookies)

Source: slightly adapted from original recipe on www.food.com

Friday, February 4, 2011

Chicken Milano


This might seriously be my new favorite "at home pasta dish"...YUM! I selected this recipe that many people stated they felt was "restaurant quality", for our family dinner that we've been having every Friday night. (It's the only night of the week that we're able to sit down for dinner together, as a family, because of our crazy schedules and it's something that our kids look forward to each week!) I really loved it, but am so very grateful that I made some adjustments, including doubling the sauce ingredients and adding extra garlic. I also felt the need to thicken the sauce a bit, because it was way too runny--thus the addition of cornstarch. My recipe below reflects the increase in sauce ingredients, however, I would suggest going ahead and doubling the recipe altogether--I have a feeling that I'll be fighting my husband for the leftovers! All kidding aside, the recipe (as written below) would be enough for a family of 4, but if you're especially big eaters or have a larger family, I'd suggest doubling it. My kids are 2 and 5, so it was more than enough for us, but if you've got older kids, you may at least want to one and a half it! Again, don't forget...I wrote the recipe to reflect the amount of ingredients I would suggest for a single recipe!

Chicken Milano

2 tablespoons butter
6 cloves garlic, minced
1/2 cup sun-dried tomatoes, chopped
2 cups chicken broth, divided
2 cups heavy cream (or half and half)
1 tablespoon cornstarch
2 pounds skinless, boneless chicken breast halves
salt and pepper to taste
3 tablespoons vegetable oil
2 tablespoons dried basil
12 ounces dry fettuccini pasta

Directions:

In a large saucepan over low heat, melt butter. Add garlic and cook for 30 seconds. Add the tomatoes and 1 1/2 cups of the chicken broth; increase to medium heat and bring to a boil. Reduce heat and simmer, uncovered, for about 10 minutes or until the tomatoes are tender. Add the cream (or half and half) and cornstarch and bring to a boil, stirring occasionally. Simmer over medium heat until the sauce begins to thicken.

Sprinkle the chicken with salt and pepper on both sides. In a large skillet over medium heat, warm oil and saute chicken. Press on chicken occasionally with a slotted spatula. Cook for about 4-6 minutes per side (depending on the size of your chicken breasts and until the chicken is no longer pink inside). Transfer to a dish, cover and keep warm. (I stuck mine in the microwave!)

Discard the fat from the skillet and in the same skillet, over medium heat, bring 1/2cup chicken broth to a boil; stirring the pan juices. Reduce slightly and add the cream sauce to the skillet. Stir in basil and adjust seasonings to taste; continue to simmer on low.

Meanwhile, bring a large pot of lightly salted water to a boil. Add fettuccine and cook according to package instructions, approximately 10 minutes; drain, transfer to a bowl and toss with 6 tablespoons of the sauce.

Transfer pasta to serving plates and top with chicken. Cut chicken into diagnoal slices and coat with the cream sauce. Sprinkle a little Parmesan cheese on top, if desired!

Source: Adapted from allrecipes.com

Wednesday, February 2, 2011

Italian Sausage Lasagna


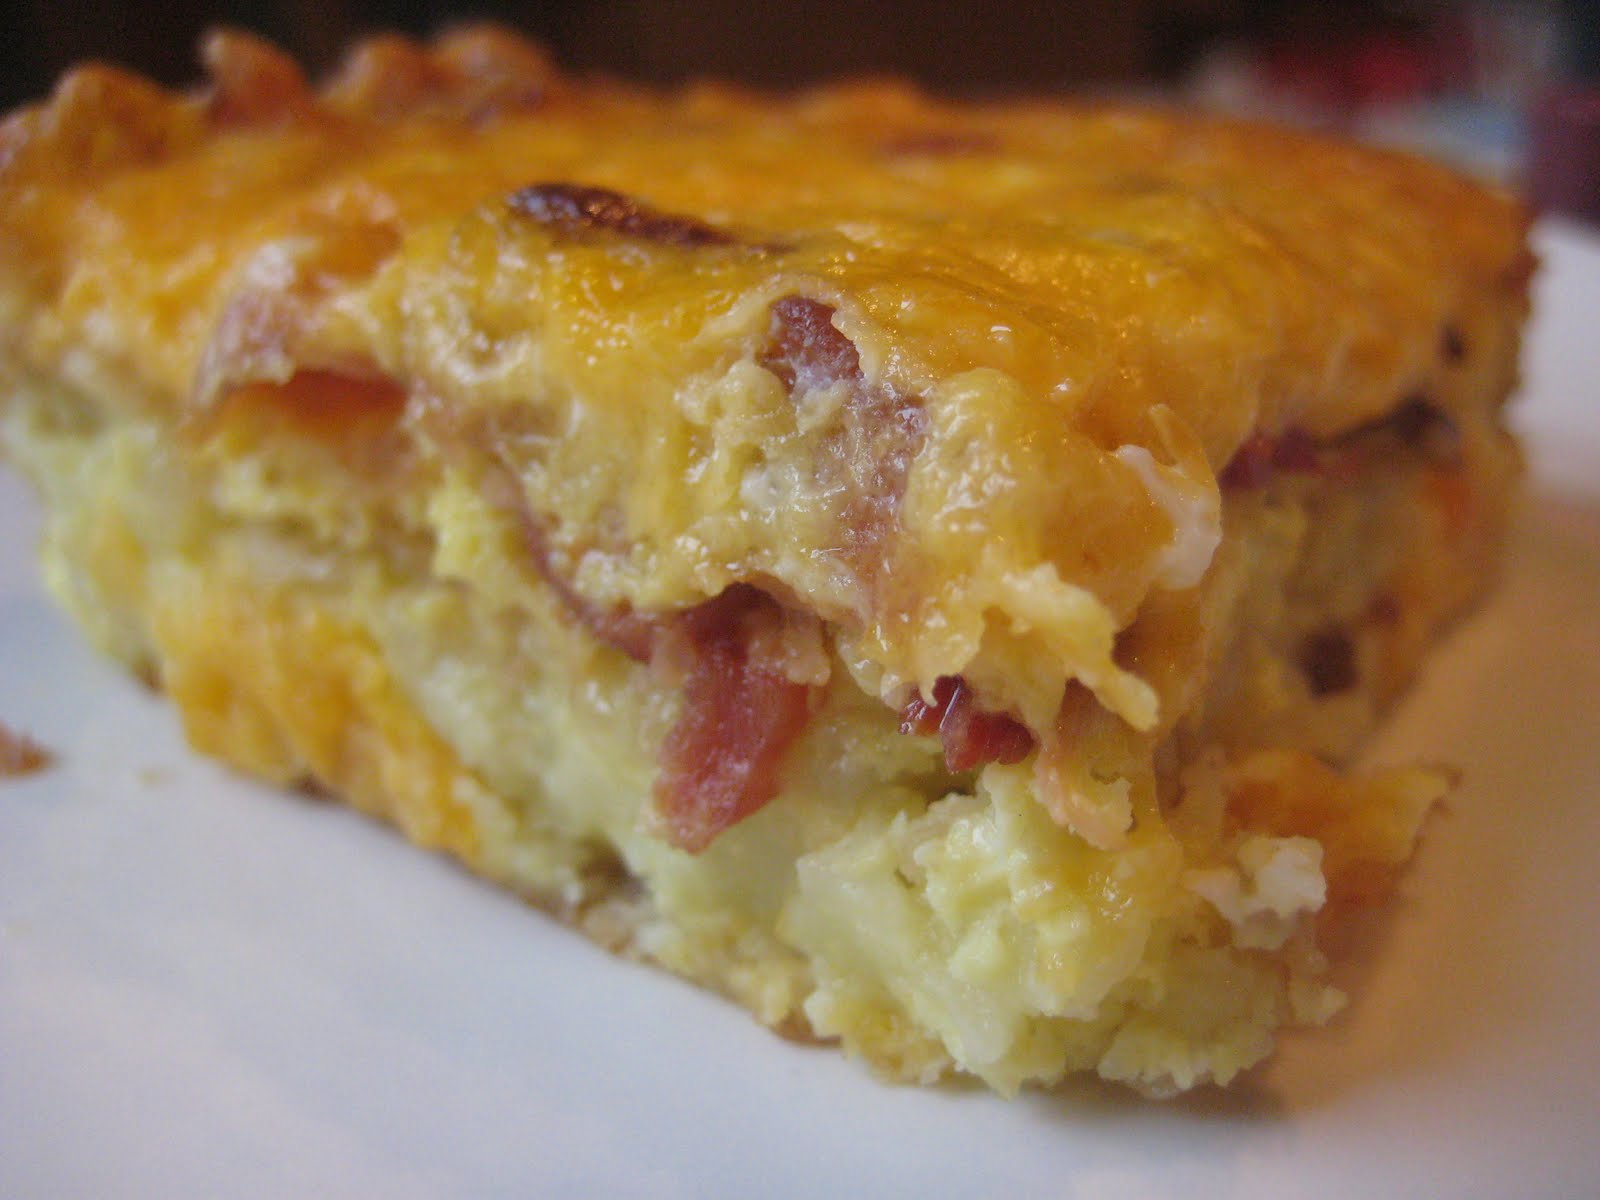
First of all, I must apologize for this horrendous picture! I didn't have much to work with in terms of lighting and there really wasn't much "color" to the lasagna. I was almost too embarrassed to post the recipe, as I was afraid the picture might deter anyone from trying it! Don't let the picture fool you--while the lasagna was rather "labor intensive", it had such a rich and hearty flavor and we're really looking forward to the leftovers tonight! Here's the thing...I don't believe I ever made homemade lasagna prior to meeting my husband and since we've been together, the ONLY lasagna he will eat is Stouffer's! He absolutely despises the taste of ricotta cheese, which is traditionally used in more authentic recipes. Yes, I realize that I could have substituted cottage cheese a long time ago, but you'd have to know my husband to understand that once he gets something in his head, it is VERY difficult to change his mind! He made up his mind that he didn't like homemade lasagna, so I stuck with Stouffer's--after all, it's relatively inexpensive (usually on sale for about $10 for a lasagna that would feed 9-12 people, depending on how big your family's appetite is!) and all you have to do is throw it in the oven...SO simple! Anyway, I decided to press my luck with this recipe and sway him more by focusing on the fact that it had Italian sausage, which he loves! We both agreed that the Italian sausage was a nice substitute for the beef, but I would even consider adding perhaps a 1/2 pound of ground beef next time (in addition to the sausage). I had a heck of a time with this recipe and had to continuously improvise as I was cooking. The original recipe called for 1 lb of Italian sausage, but I actually bought the Italian sausage in the casings (about 1 1/4 lbs) and just removed the casings prior to cooking--I'm all for buying it in the least expensive form and that's what happened to be on sale the day I did my shopping! I found that I ran out of sauce at the end, which is why I added an extra can of tomato sauce (as reflected below). I also tweaked the spices a bit and TRIPLED the amount of mozzarella cheese. I found it a bit crazy that the original recipe only called for 2 cups (8 oz) of mozzarella cheese. I mean, seriously!?!?!? Even when we buy the Stouffer's lasagna, I add 2 cups of cheese to the top...and that "supposedly" already has what they consider a sufficient amount of cheese! I couldn't even imagine eating lasagna that wasn't oozing with cheese! Anyway, if your family consists of "non-picky eaters", I would HIGHLY suggest adding spinach and mushrooms and perhaps even sauteed zucchini--that's what I would have done, had I made this lasagna for myself :) My daughter (who is almost 3) ate the lasagna, but didn't seem overly impressed, however, my son (who is almost 6), kept going on and on about it. Bless his heart...he always goes out of his way to compliment me and tell me that I "make the best recipes"...such a sweet and gracious child! All in all, I would make this again, but it's certainly not something I would make on a regular basis, as it was rather time-consuming and costly.

Before I get to my recipe, I wanted to thank my dear friend, Devonay, for the very kind words she expressed about myself and my blog. Devonay and I used to work together...she, too, is a nurse, and is one-of-a-kind! Not only is she so down-to earth and warm-hearted, but she has a witty sense of humor that I greatly appreciate! I would like to encourage you all to check out her blog, as well: lumpkinandme.blogspot.com . Her blog has a little bit of everything, but she just posted a potato soup recipe that sounds delicious!!!

Now for my recipe...

Italian Sausage Lasagna

1 - 1 1/2 lbs Italian Sausage
4-6 cloves of garlic, minced (depending on how much garlic you like!)
1 large onion, chopped
2 Tablespoons parsley flakes
1 teaspoon dried basil
1/4 teaspoon black pepper
1 teaspoon salt
1 Tablespoon sugar
(2) 15 ounce cans tomato sauce
(2) 14 1/2 ounce cans diced tomatoes
(1) 12 ounce package lasagna noodles
1 egg
2 cups ricotta or small curd cottage cheese
1/2 cup grated Parmesan cheese
1 1/2 teaspoons dried oregano
6 cups shredded mozzarella cheese (24 ounces)

Directions:

In a large skillet, cook sausage, onion and garlic over medium heat, stirring occasionally, until sausage is no longer pink; drain if necessary.

Stir in 1 tablespoon of the parsley, the basil, sugar, tomatoes and tomato sauce. Heat to boiling, stirring occasionally. Reduce heat to low; simmer uncovered about 1 hour--sauce will thicken.

When sauce has been simmering approximately 45 minutes, cook noodles as directed on package and preheat oven to 350 degrees. Drain noodles.

In medium bowl, beat the egg and mix ricotta (or cottage) cheese, 1/4 cup Parmesan cheese, remaining 1tablespoon parsley and the oregano.

Spread approximately 1 cup of the sauce mixture in ungreased 13x9-inch glass baking dish. Top with 4 noodles. (I actually added an additional noodle vertically, across the end of the dish...there was about a 2 inch gap!) Spread half of the cheese mixture over noodles and then top with about 1 1/2 cups of the sauce mixture. Sprinkle with 2 cups of the mozzarella cheese. Repeat with 4 noodles (again, I added an additional noodle!), the remaining cheese mixture, approximately 1 1/2 cups of the sauce mixture and 2 cups of the mozzarella cheese. Add one last layer of noodles and top with remaining sauce mixture. Sprinkle with 2 cups mozzarella cheese and 1/4 cup Parmesan cheese. Cover; bake 30 minutes. Uncover; bake about 15 minutes longer or until hot and bubbly. Let stand 15 minutes before cutting.

Adapted from "Italian Sausage Lasagna" on Betty Crocker.com

Tuesday, January 25, 2011

Garlic Chicken Fried Chicken


This is EXACTLY the type of recipe I've been hoping to find! Not only was it super easy, but the chicken was very flavorful and moist. I did follow the recipe almost exactly as written, except I did change part of the cooking method, per several reviewer's suggestions. I couldn't find the cord to my electric skillet to save my life, so I just used my largest skillet and fried the chicken for approximately 4-5 minutes per side and then baked the chicken breasts for 10 minutes on a 350 degree oven. The recipe states that you should combine the dry ingredients in a shallow bowl (as your first step), but I would suggest going ahead and heating up your skillet first (and preheat your oven if you want to bake them in addition to frying), and while they're heating, combine the ingredients...it didn't take very long at all--I'd venture to say it took longer for the oil to reach the correct temperature! I will definitely make this again--it's perfect for a quick weeknight meal (it shouldn't take more than 25 minutes) and was something that my entire family enjoyed!

Garlic Chicken Fried Chicken

2 teaspoons garlic powder, or to taste
1 teaspoon ground black pepper
1 1/2 teaspoons salt
1 teaspoon paprika
1/2 cup seasoned bread crumbs
1 cup all-purpose flour
1/2 cup milk
1 egg
4 skinless, boneless chicken breast halves - pounded thin
1 cup oil for frying

Directions:

In a shallow dish, mix together the garlic powder, pepper, salt, paprika, bread crumbs and flour. In a separate dish, whisk together the milk and egg.

Heat the oil in an electric skillet set to 350 degrees F (175 degrees C). Dip the chicken into the egg and milk, then dredge in the dry ingredients until evenly coated.

Fry chicken in the hot oil for about 5 minutes per side, or until the chicken is cooked through and juices run clear. Remove from the oil with a slotted spatula, and serve.

Source: Allrecipes.com

Skillet Chicken with Broccoli, Pasta and Parmesan Cheese


Oh, how we love pasta at our house! I've been spending a little bit of time each day, going through some of my favorite blogs in search of recipes to try and this particular recipe comes from Donna's blog (My Tasty Treasures). If you haven't checked out her blog, I HIGHLY recommend it--not only will you find some wonderful looking recipes, but she's one of the most down-to-earth and entertaining people I have ever "met". I love meals that can be prepared using one skillet and this dish is relatively healthy...bonus! I only made a few minor changes: I substituted penne pasta for ziti, used lemon juice from the bottle (since I didn't have fresh lemons) and I did use half and half instead of heavy cream. I've substituted half and half in countless recipes and have never noticed that much of a difference...except in the price! (Heavy cream is generally about double the cost of half and half). This is a great weeknight meal, but there was a bit of prep involved, so make sure you take that into account! My husband helped me prepare it, so that cut the prep time down significantly, but between cutting up the chicken, broccoli, sun-dried tomatoes and onions, I would allow about 15-20 minutes for prep...depending on how fast you are in the kitchen!

Skillet Chicken with Broccoli, Pasta and Parmesan Cheese

3 boneless, skinless chicken breasts, cut into 1-inch squares
Table salt and ground black pepper
3 Tablespoons olive oil
1 medium onion, minced
4 medium cloves garlic, minced
1/2 teaspoon dried oregano
1/4 teaspoon red pepper flakes
12 ounces ziti
4 1/4 cups water
2 1/2 cups low-sodium chicken broth
4-5 cups broccoli florets (depending on how much broccoli you want!)
1/2 cup oil-packed sun-dried tomatoes, rinsed and chopped coarse
3/4 cup heavy cream
3/4 cup grated Parmesan cheese or asiago
1 1/2 Tablespoons fresh lemon juice

Directions:

Season the chicken with salt and pepper. Heat 2 tablespoons of the oil in a 12-inch nonstick skillet over medium-high heat until just smoking. Add the chicken in a single layer and cook without stirring for one minute. Stir the chicken and continue to cook until most, but not all, of the pink color has disappeared and the chicken is lightly browned around the edges--1 to 2 minutes longer. Transfer the chicken to a clean bowl and set aside.

Add the remaining tablespoon of oil, onion and 1/2 teaspoon of salt to the skillet. Return the skillet to medium-high heat and cook, stirring often, until the onion is softened--2 to 5 minutes. Stir in the garlic, oregano and red pepper flakes, and cook until fragrant--about 30 seconds.

Add the pasta, 3 cups of the water, and the broth. Bring to a boil over high heat and cook until the liquid is very thick and syrupy and almost completely absorbed--about 12-15 minutes, stirring occasionally.

Add the broccoli, sun-dried tomatoes, and the remaining 1 1/4 cups water. Cover and reduce heat to medium and cook until the broccoli turns bright green and almost tender, 2-3 minutes.

Uncover and return the heat to medium-high. Stir in the cream, Parmesan cheese, and reserved chicken with any accumulated juices and continue to simmer, uncovered, until the sauce is thickened and the chicken is heated through, 1 to 2 minutes. Remove the skillet from the heat and stir in the lemon juice and season with salt and pepper to taste. Serve with additional Parmesan cheese on top, if desired.

Source: My Tasty Treasures

Wednesday, January 19, 2011

Easy Garlic Broiled Chicken


This was by far one of the most frustrating recipes--I felt like the name of the recipe was somewhat misleading...that, or I'm just a bit "cooking-challenged"! I was so excited, because I saw the word "easy" and thought how perfect it would be for a quick weeknight meal! My husband and I decided that we would make it a point to sit down every Friday for dinner, as a family, since it's the ONLY night a week that we're all home around dinnertime. I had every intention of sitting down at 7pm, but we didn't end up eating until a little after 8pm! Granted, I did bathe the kids before dinner which stalled my starting dinner a bit, but it still felt like it took forever and a day for the chicken to finish cooking--it was *supposed* to be done in 20 minutes! I followed the recipe exactly as written, which may have been my first mistake--I generally tend to take the suggestions of other "reviewers", but it seemed as if enough people stated that they made it exactly as written and enjoyed it. I almost didn't even bother posting this recipe, because I was that frustrated, but I definitely think it has potential--that, and we had the leftovers last night and it tasted delicious reheated! I can count on one hand the amount of times I've used the broiler on my oven, so that might have been part of my problem. Perhaps I should have moved the rack up a bit, but I did take one person's suggestion and left it in the middle of my oven, since they said the chicken seemed to burn on the outside real quickly, while it was raw on the inside. I initially set my timer for 10 minutes, turned and basted the chicken and then set it for another 10 minutes and when I checked on it, it didn't appear to be anywhere near done and the skin wasn't at all browned. I moved the rack up and set it back in for 5 minutes, took it out and quickly realized it wasn't done as I was cutting it up for my kids. I put it back in and ended up going through this SEVERAL times until it was finally finished! Bless my kid's hearts...they sat so patiently, eating their broccoli and salad, even though it was already pushing 8pm, which is when they're normally heading to bed! Anyway, I'm going to post the recipe below and will be very anxious to know if anyone tries it and what changes you make! Since I did enjoy the leftovers so much (and my husband and son really liked the chicken the night I made it), I will give it one more try, but next time, I think I will let the chicken sit in the sauce (turning at least once) for an hour or two, prior to cooking and will then attempt to bake the chicken at 350 degrees for about 45-50 minutes and perhaps broiling the last couple of minutes. The recipe called for a fairly substantial amount of garlic (which we love) and the kitchen smelled wonderful while it was cooking, but I didn't feel as if the sauce/flavors had enough time to infuse into the chicken and I ended up broiling my chicken thighs for closer to 40 minutes. I used 10 bone-in chicken thighs (with skin) and one and a halfed the sauce ingredients, which gave PLENTY of sauce that would have been great spooned over noodles or rice. I really think this recipe has a lot of potential and the fact that it didn't cook as quickly very much could have been "user error". Feedback would be much appreciated from those of you who experiment with this recipe!!!

Easy Garlic Broiled Chicken

1/2 cup butter
3 tablespoons minced garlic
3 tablespoons soy sauce
1/4 teaspoon black pepper
1 tablespoon dried parsley
6 boneless chicken thighs, with skin
dried parsley, to taste

Directions:

Preheat the oven broiler. Lightly grease a baking pan.

In a microwave safe bowl, mix the butter, garlic, soy sauce, pepper, and parsley.

Cook 2 minutes on High in the microwave, or until butter is melted.

Arrange chicken on the baking pan, and coat with the butter mixture, reserving some of the mixture for basting.

Broil chicken 20 minutes in the preheated oven, until juices run clear, turning occasionally and basting with remaining butter mixture. Sprinkle with parsley to serve.

Source: Allrecipes.com

Thursday, January 13, 2011

Marinated Baked Pork Chops


The first week of my husband's crazy semester is just about coming to an end! This week has really flown by, so I anticipate that the next four months will go by in the blink of an eye. I've been on a mission to find "quick weeknight meals" and as usual, turned to one of my favorite sites: Allrecipes.com. I LOVE that site for so many reasons, but one of my favorite features is the ability to search for recipes by ingredients. We've been attempting to be as cautious as possible, financially-speaking, now that my husband stepped down to a part-time position, so I looked at the sale ads and noticed that pork chops were on sale this week. I searched on allrecipes.com, listing "pork chops" as my ingredient and was then able to sort the recipes, listing them in order of which received the highest ratings. This particular recipe had over 940 reviews and received 4 1/2 out of 5 stars. I was drawn to the simplicity of the preparation aspect of the recipe and that there really was very little to do during the cooking process. My husband (who is BY FAR the pickiest eater of the four of us) went back for seconds...he said he really enjoyed dinner :) I would make a few suggestions, however, to the original recipe. I tripled the sauce ingredients, allowing extra sauce to spoon over the rice that I served as one of my sides...we also had green beans. The recipe didn't really specify a particular type of pork chop, but my husband picked up a package of the assorted pork chops and I used the center cut pork loin chops. They were approximately 1/2 inch thick and I made five, since I knew my kids likely would opt to eat something else. The recipe suggests baking for an hour, but I baked mine for approximately 45 minutes and then broiled them for an additional 2 minutes and while I would make these again, I would cut back on the cooking time. I'm thinking 40 minutes would have been plenty of time, but obviously you'll want to make sure they're thoroughly cooked, so you may have to experiment a bit on your own. I'd definitely check them closer to 40 minutes, though! I'm going to list the recipe as originally written, but I would very much encourage you to take my suggestions into account--especially tripling the sauce ingredients and cutting back on the cooking time!

Marinated Baked Pork Chops

1 tablespoon soy sauce
2 tablespoons vegetable oil
1 tablespoon Worcestershire sauce
1 teaspoon lemon juice
2 tablespoons brown sugar
2 tablespoons ketchup
6 pork chops, trimmed

Directions:

Preheat oven to 350 degrees F (175 degrees C).

In a small bowl, thoroughly blend soy sauce, vegetable oil, Worcestershire sauce, lemon juice, brown sugar, and ketchup.

Place pork chops in a medium baking dish, and spread with 1/2 the sauce.

Bake pork chops 30 minutes in the preheated oven. Turn, and spread with remaining sauce. Continue baking 30 minutes, or until internal temperature of the chops has reached 160 degrees F (70 degrees C).

Source: Allrecipes.com

Friday, January 7, 2011

Turkey Tetrazzini and an Update


Well, well, well...it has been WAY too long since my last post! There have been many changes the past five months and it's been a bit of a struggle to get into somewhat of a groove and attempt to bring some degree of normalcy back to the very chaotic schedule we are now juggling! I've always been a creature of habit--I swear by my planner and can't stand deviating...if I can get something done a week ahead of time, that would be my preference. Unfortunately, all of these changes have forced me to deviate a bit and "planning" is becoming more and more impossible--hence the lack of posts/new recipes! Just to back up a bit...my husband and I had a lengthy conversation back in July and he decided that he really wanted to go back to school to pursue a degree in Nursing. He's taken classes here and there, but it's been difficult to really buckle down and focus, while working full-time, finding time for our two small children and attempting to juggle our work schedules so that one of us can always be home with the kids. We decided that I would go back to working full-time hours (and more, when I'm able to get additional shifts) and he would go down to a part-time position and start taking classes on a full-time basis. That certainly has been easier said than done! This next semester is going to be especially crucial for my husband, as he is getting ready to apply to the nursing program by April 1st and should *hopefully* find out by early June if he is accepted. Keep in mind...I'm someone who doesn't do well with the "unknown" and the suspense of waiting to find out whether or not he's accepted and/or what our alternate plan will be since the program he's applying to is very competitive, is absolutely driving me crazy! This blog had always served as somewhat of a diversion for me, which is why I am excited about jumping back in and shifting my focus a bit! I certainly can't promise "fancy meals", by any stretch of the imagination, but my goal is to seek out recipes for everyone else trying to juggle crazy schedules and live on a budget! My husband is going to have late classes, several days a week, so my intent is to find recipes that reheat well or those that can be frozen and ready to serve after defrosting and rewarming!

My first recipe for the New Year is Turkey Tetrazzini. My children requested turkey for Christmas dinner--actually, my son's actual request was for "whole body turkey"...as opposed to just a turkey breast :) The last thing I wanted to do was disappoint my kids, so I began watching the sale ads to see if anyone had turkey on sale. Naturally, no one did...I mean, really...why would they when they know many people serve turkey for Christmas and will pretty much be suckered into paying whatever they charge?!? I'm one of those people who firmly believes that everything happens for a reason and on my way home from work one night, I stopped at Target to pick up some last minute stocking stuffers. I was making my way toward the "Health and Beauty" area, but for some reason, I took the long way around and passed by a frozen display of whole turkeys. I went over to check the price, figuring that Super Target, of all places, would be exorbitantly expensive (as their meats tend to be) and they had turkeys for $.39/lb! I have never seen turkey so cheap and was beyond excited to bring it home and show the kids! The thing is...seeing as how this turkey was just for the four of us, a 10-12 lb turkey would have been more than enough, but I picked the largest one I could find...about 18 lbs. Shockingly, there was a TON left and seeing as how we were going out of town the middle of the following week, I had no idea what to do with all of the remaining turkey?!? I froze the turkey carcass (in anticipation of making soup), along with the obscene amount of leftover turkey. When we returned from my parents' house, after having a wonderful and relaxing visit with them for New Year's, I thawed out the turkey carcass and my bag of turkey. I made a HUGE pot of soup--and when I say "huge", that is a major understatement! (I have 3 LARGE containers in the fridge and had to freeze another 3LARGE containers--and that's after my husband and I ate a ton!) While we were visiting my parents, my Mom suggested that I make turkey tetrazzini with some of the leftover turkey. I naturally went directly to Allrecipes.com and found a recipe that received great reviews, although I only somewhat loosely followed it and took many of the reviewers suggestions, in addition to adding some of my own. My husband seemed to really enjoy it and seeing as how he's a pretty picky eater, it's always a major compliment when he makes a point to comment on something that I make! My kids liked it, as well, and as for myself...I definitely liked it, but think I might try it with chicken next time. I wouldn't hesitate to use it again if I had leftover turkey, but I'm not sure that I would go out of my way to buy turkey for the recipe. It's funny, too, because some of the people who reviewed the recipe mentioned that they felt it was a bit bland, so I made sure I added extra seasoning, however, I would even consider adding a bit more salt next time. The original recipe didn't call for any salt whatsoever. One other major change that I made that is unlike more traditional tetrazzini recipes, was that I substituted penne pasta for spaghetti, per my husband's request, and I would definitely do that again! I hope you enjoy and be on the lookout for more recipes in the very near future!

Turkey Tetrazzini

1 (16 ounce) package uncooked penne pasta (or spaghetti)
10 tablespoons butter or margarine
1 onion, diced
5 cloves garlic, minced
1/2 cup all-purpose flour
3 cups chicken broth
2 cups milk
1/2 tsp black pepper
1 tsp salt
1 1/2 cups grated Parmesan cheese
4 cups chopped cooked turkey (or chicken)
1 cup frozen peas
Italian breadcrumbs

Directions

Bring a large pot of lightly salted water to a boil and cook pasta according to package instructions. While pasta is cooking, preheat oven to 350 degrees.

Melt butter in a medium saucepan over medium heat; add diced onions and minced garlic, stirring frequently. Stir in flour, until blended. Add chicken broth, milk, salt and pepper and bring to a boil, stirring occasionally. Remove from heat and stir in 1 cup of Parmesan cheese.

When pasta is done cooking, drain and return to pot. Add chopped turkey, peas and chicken broth mixture to the pasta and stir to blend all ingredients together.

Pour into a lightly greased 9 x 13 baking dish and sprinkle with remaining Parmesan cheese and top with Italian breadcrumbs. Bake uncovered for approximately 45-50 minutes.

Adapted from Allrecipes.com