Friday, July 22, 2011

Super Simple Chicken


Yet again, I have gone quite a long stretch without blogging, but things have been SUPER busy around here. My husband has officially been accepted into nursing school (and will start next month)--it's been quite a long journey, but there's FINALLY a light at the end of the tunnel! He'll graduate in May 2013 and I couldn't possibly be anymore excited--just two more years and then hopefully we can return to some degree of normalcy! He's taking two summer courses (both of which have required an ungodly amount of time), while we both work as much as possible and spend time with our two crazy little kids! Due to the fact that we're always running in different directions and we both work long shifts at the hospital (and get home generally after the kids are in bed), we haven't really had anything too fancy...hotdogs, pizza and tacos have been making regular appearances on my weekly menus, as have those quick, frozen skillet meals! Starting this Fall, I will be home Monday through Friday (and working weekends exclusively), so I will have MUCH more time to cook and experiment with new recipes--especially since my son will be going to school all day, starting this year, and it will just be my daughter and I home during the day. Bless her heart, she's got quite a little sweet tooth, so I'm sure you'll see an increase in my dessert posts, as well!

As for my recipe, I must admit...if I had my way, I normally would prefer to have my husband grill split chicken breasts! He always manages to cook them perfectly and I just prefer that "grilled" taste. Unfortunately, the night we made these, I knew he wouldn't be home until close to 8pm and since I had to be up for work at 4:30am, I didn't want to eat dinner too late. I generally don't have the best luck preparing baked chicken, especially bone-in chicken breasts...they tend to be on the drier side and not overly flavorful. This recipe, however, was the PERFECT alternative to grilling and will come in most handy in the winter. It took all of 5 minutes to prepare the chicken and while the original recipe stated that you should bake them for 1 hr to 1 hour and 15 minutes, I found ours to be fully-cooked after approximately 45 min. (Definitely watch them carefully!) I seasoned each breast very generously, with each of the seasonings and they were bursting with flavor and were so moist, that the juices immediately flowed out upon cutting into them. While I think the leftovers would be great reheated on a low oven, I'm actually looking forward to cutting them up and making a nice, hearty salad...sounds like a refreshing, light meal idea with this intense heat! I hope everyone is staying cool and enjoying their summer!

Super Simple Chicken

4 bone-in chicken breast halves, with skin
4 tablespoons butter
dried basil
thyme
garlic powder
Kosher salt
Pepper
1/4 cup lemon juice

Directions:

Preheat oven to 350 degrees F (175 degrees C).

Place chicken breasts in a lightly greased 9x13 inch baking dish. Add lemon juice to bottom of dish. Dot each breast with 1 tablespoon of butter or margarine, then season each breast generously, with each of the above seasonings.

Bake at 350 degrees F (175 degrees C) for approximately 1 hour. (Make sure to check around 45min to avoid over-cooking!)

Source: Adapted from Allrecipes.com

Tuesday, May 24, 2011

Parmesan-Crusted Pork Chops


Grocery shopping has become one of my ultimate frustrations lately, as the prices of fresh meat/poultry/fish are nauseating! We've about had our fill of chicken, so I spent a little more than I normally would on a family-sized package of center cut pork loin chops. I figured the pork would be a bit healthier than red meat and ever since I tried breaded pork chops not that long ago, I have been in search of other variations. I realize I just posted a Parmesan Baked Perch recipe, so I apologize for the back-to-back "Parmesan-themed recipes", but I knew I couldn't go wrong with a recipe from Giada! My husband and I both felt that this recipe was a keeper and my son loved these chops so much that he even requested a second one! This is definitely another great, quick, weeknight meal!

Parmesan-Crusted Pork Chops

2 large eggs
1 cup dried Italian-style bread crumbs
¾ cup freshly grated Parmesan
4 (1/2 to 3/4 inch thick) center cut pork loin chops
salt and pepper
3 tablespoons olive oil
*optional lemon wedges for serving*

Directions:

Whisk the eggs in a shallow bowl to blend. Place the bread crumbs in another shallow bowl or plate. Place the parmesan cheese in a third shallow bowl or plate. Sprinkle the pork chops generously with salt and pepper. Coat the chops completely with the cheese, patting to adhere. Dip the chops into the egg, then coat completely with the bread crumbs, patting to adhere.

Heat 3 tablespoons olive oil in a large skillet over medium heat. Add the pork chops, in batches if necessary, and cook until golden brown and the center reaches 150 degrees, about 6 minutes per side. Transfer the chops to a plate and serve with lemon wedges.

Source: Giada De Laurentiis (Foodnetwork.com)

Sunday, May 15, 2011

Baked Parmesan Perch


Well, I went grocery shopping the other day and as usual, only chicken was on sale, so as I was attempting to make room in my freezer for the random frozen items I purchased, I found a bag of perch. By no means am I a "food snob", but I'm finding it quite difficult to find frozen fish that I really enjoy. The bottom line is that nothing beats fresh fish--it's just hard to rationalize spending $7-$10/lb, while on a budget! I'm hoping against hope that trout or salmon goes on sale in the near future--not only because I'm desperately craving them, but because I have a couple of REALLY good recipes to share and they won't be near as good on frozen fish. As far as this recipe is concerned, I actually was pleasantly surprised at how flavorful the fish was and it was SO easy! Another recipe I will be adding to my rotation, especially when I'm in need of a quick weeknight meal!

Baked Parmesan Perch

1/4 cup dry bread crumbs
3 tablespoons grated Parmesan cheese
1 tablespoon paprika
1 teaspoon dried oregano
1 1/2 teaspoons lemon pepper seasoning
1 pound perch or fish fillets of your choice
3 tablespoons butter or margarine, melted

Directions:

In a shallow bowl, combine the bread crumbs, Parmesan cheese, paprika, oregano and lemon pepper seasoning. Brush fish fillets with butter, then dip into the crumb mixture. Place in a greased baking pan. bake, uncovered, at 500 degrees F for 10 minutes or until fish flakes easily with a fork.

Source: Adapted from allrecipes.com

Monday, May 9, 2011

Chicken Scampi


First of all, I seriously have every intention of posting some beef recipes just as soon as our local stores have reasonable prices! I can't quite psych myself up to spend $3/lb for regular ground beef...not even ground chuck! Even chuck roast has been $4-ish a pound...RIDICULOUS! Chicken happens to be the only thing on sale these days and I have to stick to my budget! I am so very proud to announce that my husband got straight A's this semester, so this was our celebratory meal in his honor :) Now, we just have to wait another few weeks to find out if he gets accepted into nursing school to start this Fall. If he receives an acceptance letter, I'm most definitely splurging on some good steaks!!! I also will remain on the hunt for quick weeknight meal ideas, because I'm hoping to work a ton to sock away money for next semester--if anyone has any ideas, please do share!

As for this recipe, I found it to be very simple to prepare and was a huge hit with my family. My husband polished off his plate and I think he took the leftovers for work today and my son requested seconds the night I prepared it. I followed the basic recipe on allrecipes.com, but tweaked it a bit. Would definitely make it the very same way next time! If you enjoy garlic and Italian-style food, this recipe will be right up your alley! (Oh, and did I mention that from start to finish, it took all of 25 minutes?!?)

Chicken Scampi

1/2 cup butter or margarine (1 stick)
1/3 cup olive oil
1 teaspoon dried parsley
1 teaspoon dried oregano
6 cloves garlic, minced
1 teaspoon sea salt
1 1/2 tablespoons lemon juice
1/4 cup white wine
1 1/2 pounds chicken tenderloins (I happened to use these, because they were on sale for the same price as the boneless, skinless chicken breasts, but you could actually just use the boneless, skinless chicken breasts and cut them into 1 inch wide strips)

Directions:

In a large skillet, heat the butter or margarine and oil over medium high heat, until the butter/margarine melts. Add the parsley, oregano, garlic and salt and mix together in the skillet. Stir in lemon juice and white wine.

Add the chicken and saute for about 3-4 minutes or until chicken turns white on the outside. Lower the heat and cook for about 10 to 15 minutes or until chicken is cooked through and the juices run clear. (Watch the chicken carefully...mine was done in closer to 10 minutes). ***Also, you may have to add additional butter/margarine, while the chicken is cooking--I added an extra 1/2 stick***

Serve over pasta or rice. I used one pound of thin spaghetti, because I didn't have any angel hair on hand--this was more than enough for my family of 4.

Source: Adapted from allrecipes.com

Thursday, May 5, 2011

Chicken with Rosemary-Onion Sauce


Anytime I see someone post a recipe that is a "quick weeknight meal" idea, I immediately jump on it--especially when it's endorsed by someone like Krista, of Krista's Kitchen! I have yet to try a recipe of Krista's that I have disliked! I actually intended to make this about a week ago, but had yet another "incident" with chicken I purchased at Meijer. It was marked "sell by April 30th" and seeing as how I was preparing it April 27th, I hardly anticipated my chicken smelling like rotten eggs when I opened the package. NOT a happy camper--especially because this was not the first time I've had a problem with their meat/poultry!

I have to laugh now (although I wasn't finding it overly amusing the night I made it), but looking back at Krista's post regarding the meal, she mentioned that her kids were not big fans of the "gravy". Ironically, my kids and I all really enjoyed the chicken, "gravy" and all (although I did put it sparingly on my kids' chicken)--it was my husband who didn't seem to care for it. (Not overly surprising--he's the pickiest eater in our home!) He thought the onion flavor was "too overpowering". Here's the thing...I fully admit that I've had onions that were VERY strong and while I happen to enjoy the flavor of onion, there have been times in which I've scraped off some excess, because it was in fact "too overpowering". By no means did I think the onion flavor was too much--it was actually a very mild onion. He kills me, too, because he asked me "are the onions cooked?". Ummmm...yeah...by TWO different methods! Not only did I saute them, but they were then baked within the sauce for about 25 minutes while my chicken was in the oven. (He even watched me take the chicken out, with the sauce covering it!) I love him dearly, but he drives me crazy sometimes!!! I've mentioned this in prior posts, but before we started dating (about 10 years ago), he literally ate the same 3-4 meal rotation. He NEVER would have considered eating onions before I started cooking for him, but he will eat them in certain dishes now. As far as this dish is concerned, I'm honestly not sure if it was more in his head, just because he previously had himself convinced that he didn't like onions and this chicken was obviously smothered in them. If he'd be willing to try it again, perhaps I'll try a Vidalia onion...doesn't get much more mild than that! In the meantime, I'm going to enjoy devouring the leftovers, all by myself :)

Just one more thing before I post the recipe! This potentially could be a fairly healthy recipe if you follow it according to how Krista posted it. I used what I had on hand, as opposed to making a point to pick up reduced-sodium chicken broth and fat free milk. (I'm awful, I know!)Chicken with Rosemary-Onion Sauce

4 boneless skinless chicken breast halves (I used about 2 lbs)
1/2 teaspoon salt
1/4 teaspoon pepper
3 teaspoons butter, divided
1 medium onion, chopped
1 garlic clove, minced
4 teaspoons all-purpose flour
1/2 cup reduced-sodium chicken broth (I used regular chicken broth)
1/2 cup fat-free milk (I used 2%...that's all I had!)
1 teaspoon dried rosemary, crushed

Directions:

Sprinkle chicken with salt and pepper. In a large nonstick skillet,
brown chicken in 1 teaspoon butter. Transfer to an 11-in. x 7-in.
baking dish coated with cooking spray.

In the same skillet, saute onion and garlic in remaining butter until
tender. Stir in flour until blended. Gradually stir in broth and
milk. Add rosemary. Bring to a boil; cook and stir for 2 minutes or
until thickened.

Pour sauce over chicken. Cover and bake at 350° for 20-25 minutes
or until chicken juices run clear. Yield: 4 servings.

Source: Krista's Kitchen (originally from Light and Tasty Magazine)

Monday, April 25, 2011

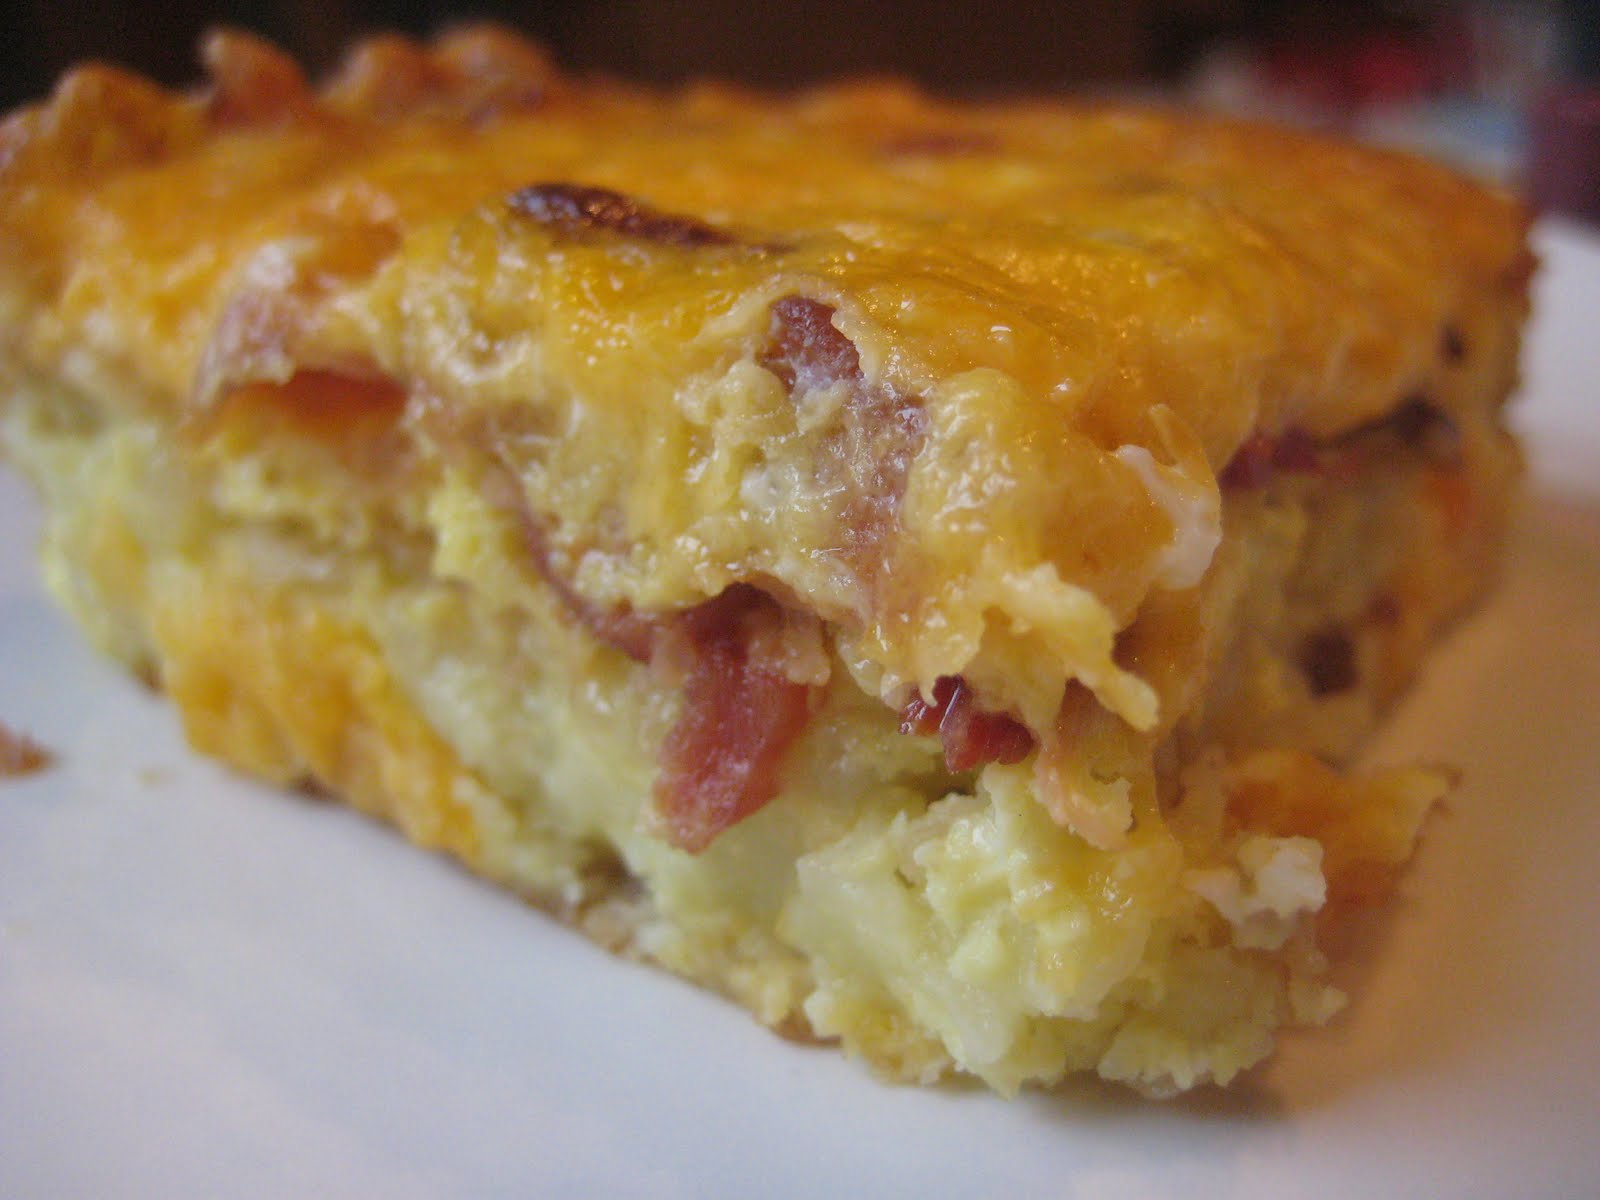
Breakfast Casserole


As you've likely noticed, I'm somewhat behind on my posting AGAIN! The time is just constantly getting away from me--it seems like it was just January and I was feeling as if this semester would drag by for my husband, but here we are and he's getting ready to take his finals next week! It's been somewhat challenging coordinating our schedules, between his schooling and our jobs, but despite my lack of posts, I have actually been trying new recipes here and there! I have several recipes that I need to just sit down and post very shortly, but in the meantime, I thought I'd at least get started with this. I'm guessing there are many of you who had ham for dinner last night and this is a great way to utilize your leftovers! I first tried this casserole the weekend of my kids' birthday party...back around my last post! We had my kids' party on Saturday and then had a brunch in honor of my parents' birthdays on Sunday. I took one bite of this casserole and LOVED it! I've tried other breakfast casseroles in the past and "liked" them, but never found one that I was overly crazy about. One thing I've found with the majority of breakfast casserole recipes is that they call for white bread and at least in my experience, I've found that it gets very soggy and there's nothing I despise much more than soggy bread! My sister made this casserole again for a brunch in honor of my grandmother's 80th birthday, a couple of weeks ago, and as soon as I took that first bite, I was already trying to think of a perfect opportunity to make it again. The recipe actually calls for ham, which is how I had it the first two times. I made it for brunch yesterday morning and used bacon instead, since my husband does not care for ham. (He hadn't tried it the first two times, because of the ham and I knew he'd like it if I made that one little substitution!) To be completely honest, I preferred the ham. It's not that the bacon wasn't "good", but I just seemed to enjoy the ham more. Had I not been making this casserole primarily for my husband and I, I would have even liked to have added some veggies--maybe some mushrooms, green peppers and onions. (There's NO way my husband would have eaten it, though, had I gone that route!) The recipe calls for hash brown patties as the base and a fair amount of cheese, so it's pretty rich in and of itself. I would definitely recommend it for a brunch or even for a breakfast potluck :) It's SO very easy to assemble and can even be prepped the night before!

Breakfast Casserole

8 frozen hash brown patties
4 cups shredded Cheddar cheese
1 pound diced/cubed fully cooked ham
8 eggs
1 cup milk
1/2 teaspoon salt
1/2 teaspoon ground mustard

Directions:

Place hash brown patties in a single layer in a greased 13-in. x 9-in. x 2-in. baking dish. Sprinkle with cheese and ham.

In a bowl, beat eggs, milk, salt and mustard. Pour over ham.

Cover and bake at 350 degrees for 1 hour. Uncover; bake 15 minutes longer or until edges are golden brown and a knife inserted near the center comes out clean.

Source: Sarah O'Brien (originally from Taste of Home)

Wednesday, March 16, 2011

Homemade Pizza Crust and Simple Pizza Sauce


My husband and I had been trying so hard to come up with the perfect menu for our kids' combined birthday party this past weekend. I'm not exactly sure what prompted my initial thought, but I started thinking that it might be fun to set up a "make-your-own-pizza" table and allow for a more interactive party, also giving each person the opportunity to have exactly what they wanted! Ordering pizzas was one of our initial considerations, but I always worry that someone may not like what I choose to order or we may run out of a particular variety of pizza that is more of a "hit", forcing people to eat what's left. One of my biggest concerns was selecting a pizza crust. I've never made homemade pizza dough as an adult, so my natural inclination was to purchase something like Boboli (or something of that sort). Then, at just the perfect time, I saw a recipe posted on Macaroni and Cheesecake for a thin crust pizza and easy homemade pizza sauce, originally taken from Annie's Eats. I was all set to make this particular pizza crust recipe, but knew the week of the party was going to be chaotic and was concerned that I wouldn't have enough time to make the dough ahead of time to try it out (primarily to familiarize ourselves with what we were working with so we didn't have a disaster on our hands the day of the party!). I linked directly to Annie's Eats and found another pizza dough recipe that she spoke very highly of and it just so happened that this recipe could be made within a few hours...as opposed to having to make it and allow it to sit in the fridge for at least 24 hrs. We tried this recipe a few days before the party and were amazed at how easy it was to make the dough and even more so by how great the pizza tasted! While I did greatly enjoy this recipe and would recommend it/make it again, I am kind of anxious to try the initial thin crust recipe that I saw on Macaroni and Cheesecake. This definitely is a more substantial dough--much more like a hand-tossed. The recipe, as written, makes (2) medium pizzas or (4) calzones. We made (4) individual sized pizzas from each recipe, but they were PLENTY filling...most everyone had some left! The sauce recipe was incredibly easy, as well, but if you don't want to mess with making your own, you could always use your own store-bought sauce. It seriously is SO easy, though and takes all of maybe 5 minutes to prepare! All in all, I think the pizza idea was a huge success...the only problem was that I desperately needed a double oven, but everyone patiently waited and made their pizzas in shifts :) Definitely consider trying this recipe out, instead of buying store-bought crust next time!


Homemade Pizza Crust and Simple Pizza Sauce

½ cup warm water
2¼ tsp. instant yeast
4 cups (22 oz.) bread flour, plus more for dusting
1½ tsp. salt
1¼ cup water, at room temperature
2 tbsp. extra-virgin olive oil

Directions:

Measure the warm water into a 2-cup liquid measuring cup. Sprinkle the yeast over the top. In the bowl of a stand mixer fitted with the paddle attachment, combine the bread flour and salt, mixing briefly to blend. Measure the room temperature water into the measuring cup with the yeast-water mixture. With the mixer on low speed, pour in the yeast-water mixture as well as the olive oil. Mix until a cohesive dough is formed. Switch to the dough hook. Knead on low speed until smooth and elastic, about 5 minutes. Transfer to a lightly oiled bowl, turning once to coat. Cover with plastic wrap and let rise until doubled in size, 1½-2 hours.

Press down the dough to deflate it. Transfer the dough to a lightly floured work surface. Divide the dough into two equal pieces. Form each piece of dough into a smooth, round ball. (If freezing the dough, wrap in plastic wrap and freeze at this point.) Cover with a damp cloth. Let the dough relax for at least 10 minutes but no longer than 30 minutes.

To bake, preheat the oven and pizza stone to 500˚ F for at least 30 minutes. Transfer the dough to your shaping surface, lightly sprinkled with cornmeal. Shape the dough with lightly floured hands. Brush the outer edge lightly with olive oil. Top as desired. Bake until the crust is golden brown, and cheese is bubbling, 8-12 minutes.

For the sauce:

1 (28 oz.) can whole peeled tomatoes, drained
1 tbsp. extra-virgin olive oil
1 tsp. red wine vinegar
2 cloves garlic, minced or pressed
1 tsp. salt
1 tsp. oregano
¼ tsp. ground black pepper

Directions:

Combine all ingredients in a food processor. Blend until smooth, about 30 seconds. Transfer to a bowl or container and refrigerate until ready to use.

Source: Annie's Eats